
Intacct
Sage Intacct provides web or cloud-based financial management and accounting applications for businesses and CPA firms. Its products include HR and People Management, Accounting and Financials, Budgeting and Planning, Dashboard, and Reporting, etc.
Pricing Intacct pricing is based on a monthly, per-user license fee.
Integration Information
Data Collected
- Members: email, name, role (CRM, Business, Employee, View only, Admin), last seen
Connection details
- Status: General Availability
- Type: api
- Permissions required:
* User generating the access key has to be an admin.
Instructions
Requirements
Make sure you have a user account with Full Admin access to Sage Intacct, so you will be able to configure it properly.
Setup Intacct
Enable Web Services subscription
To enable the Web Services subscription, log in to Sage Intacct:
- Go to Applications \Company \Admin \Subscriptions
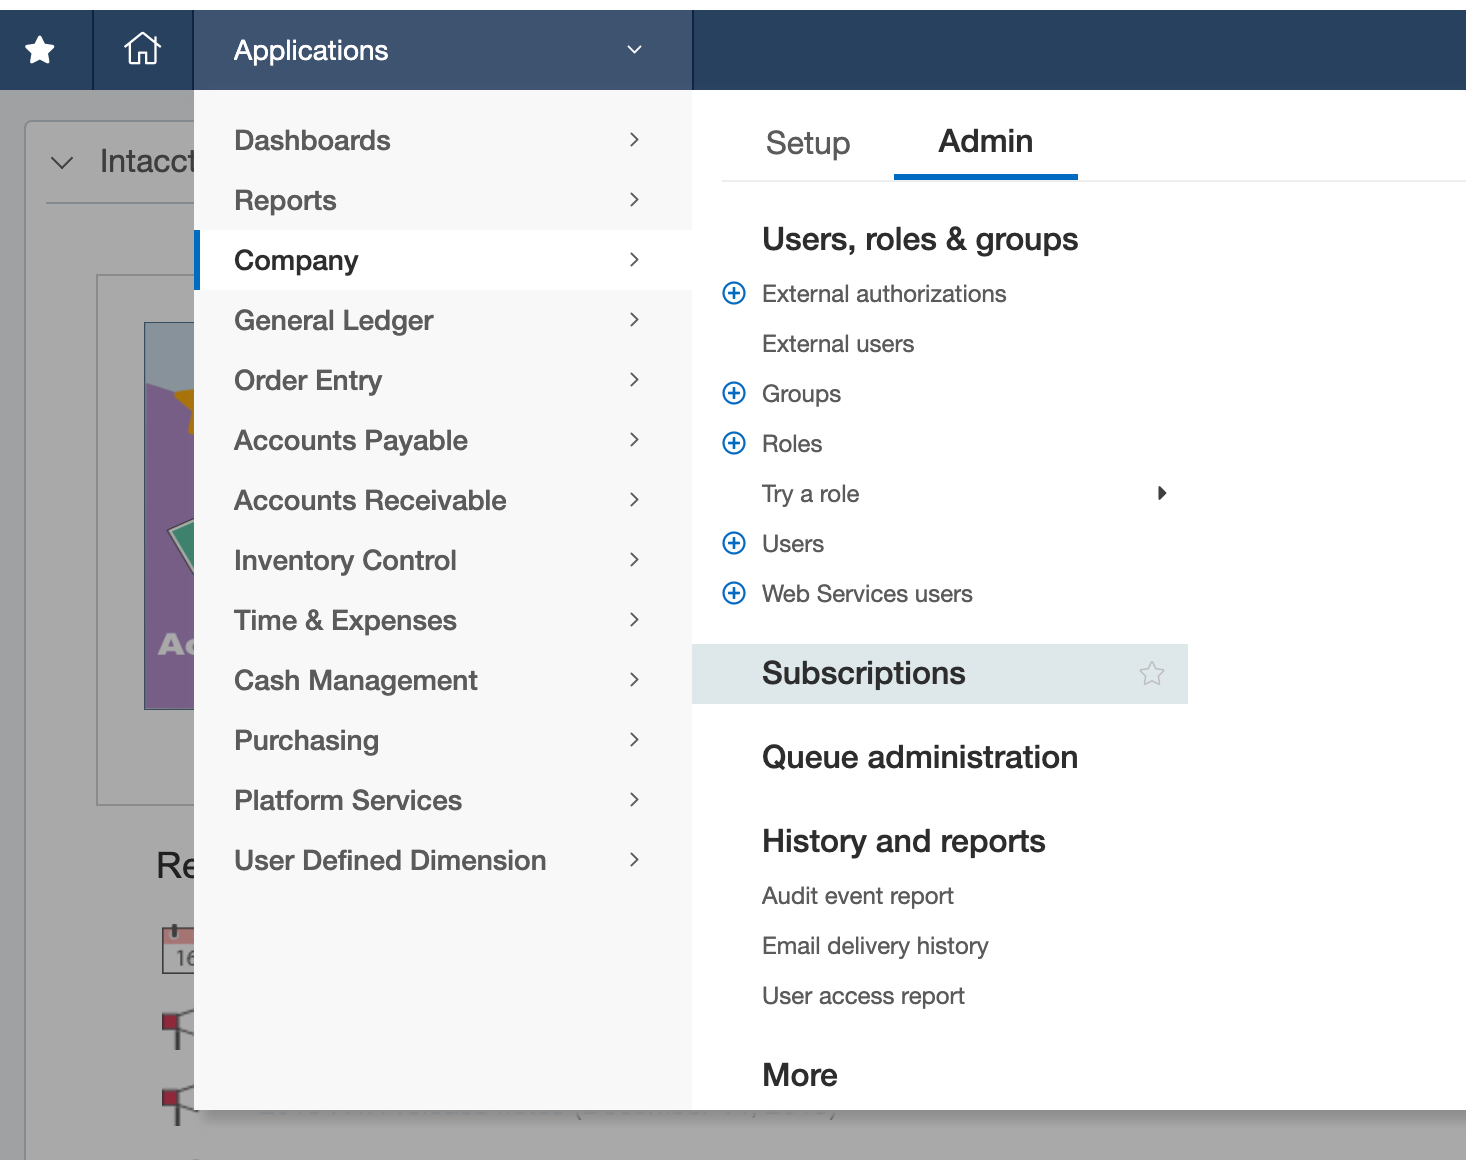
- Make sure Web Services are under Subscribed applications

- If Web Services are not enabled yet, enable them.
Authorize Web Services Sender ID
To authorize Web Services Sender ID:
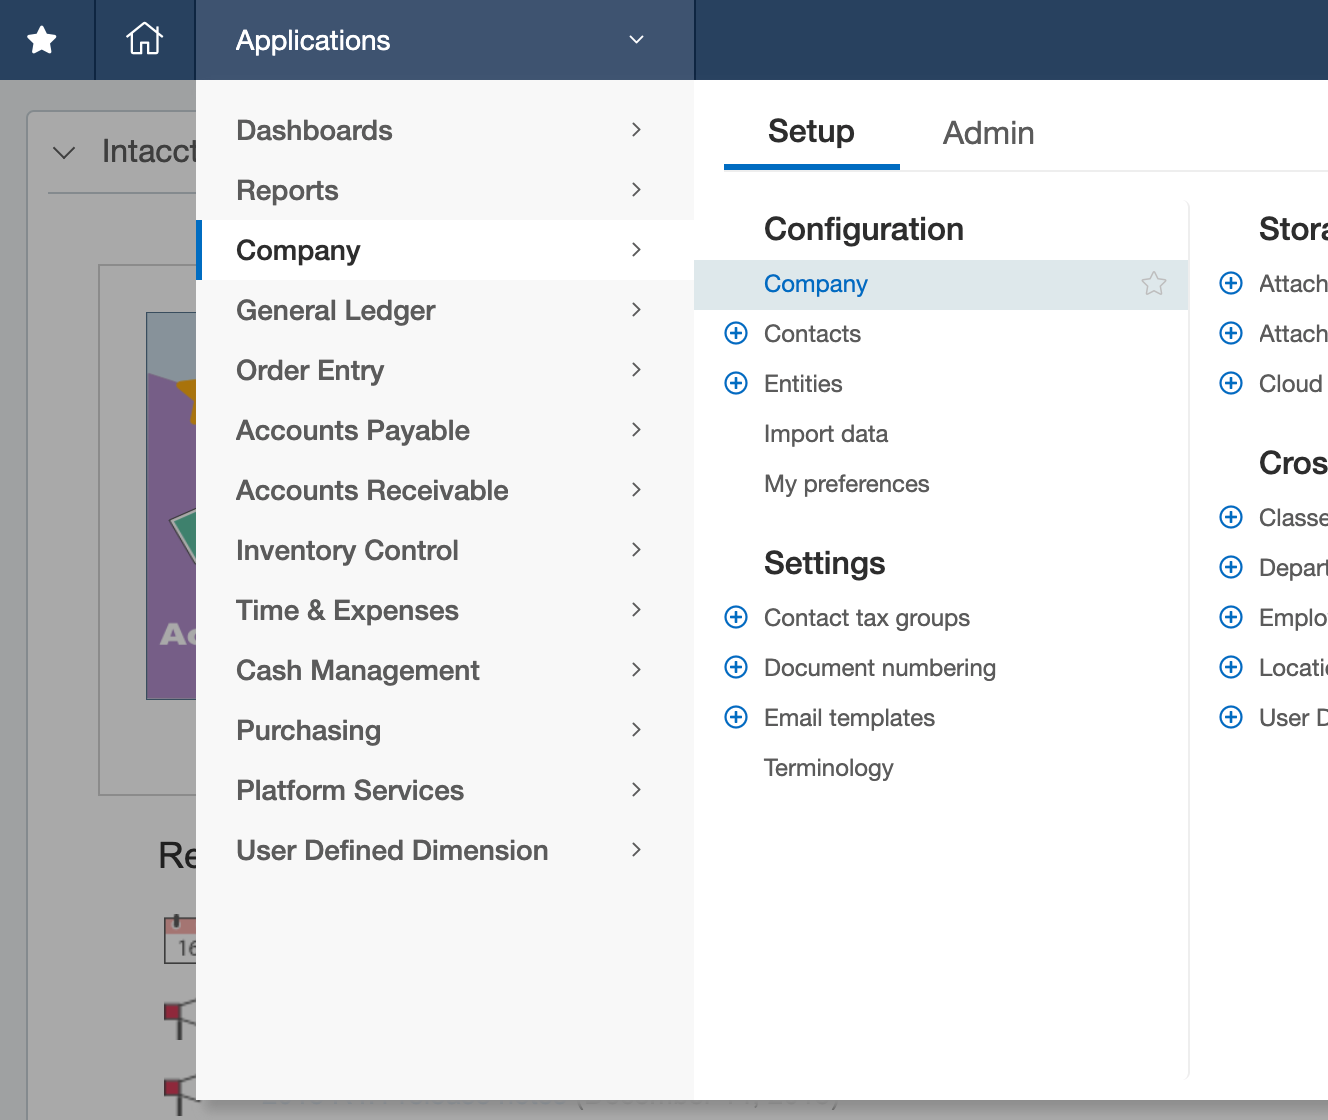
- Go to Applications \Company \Setup \Company.
- Select the Security tab and click Edit
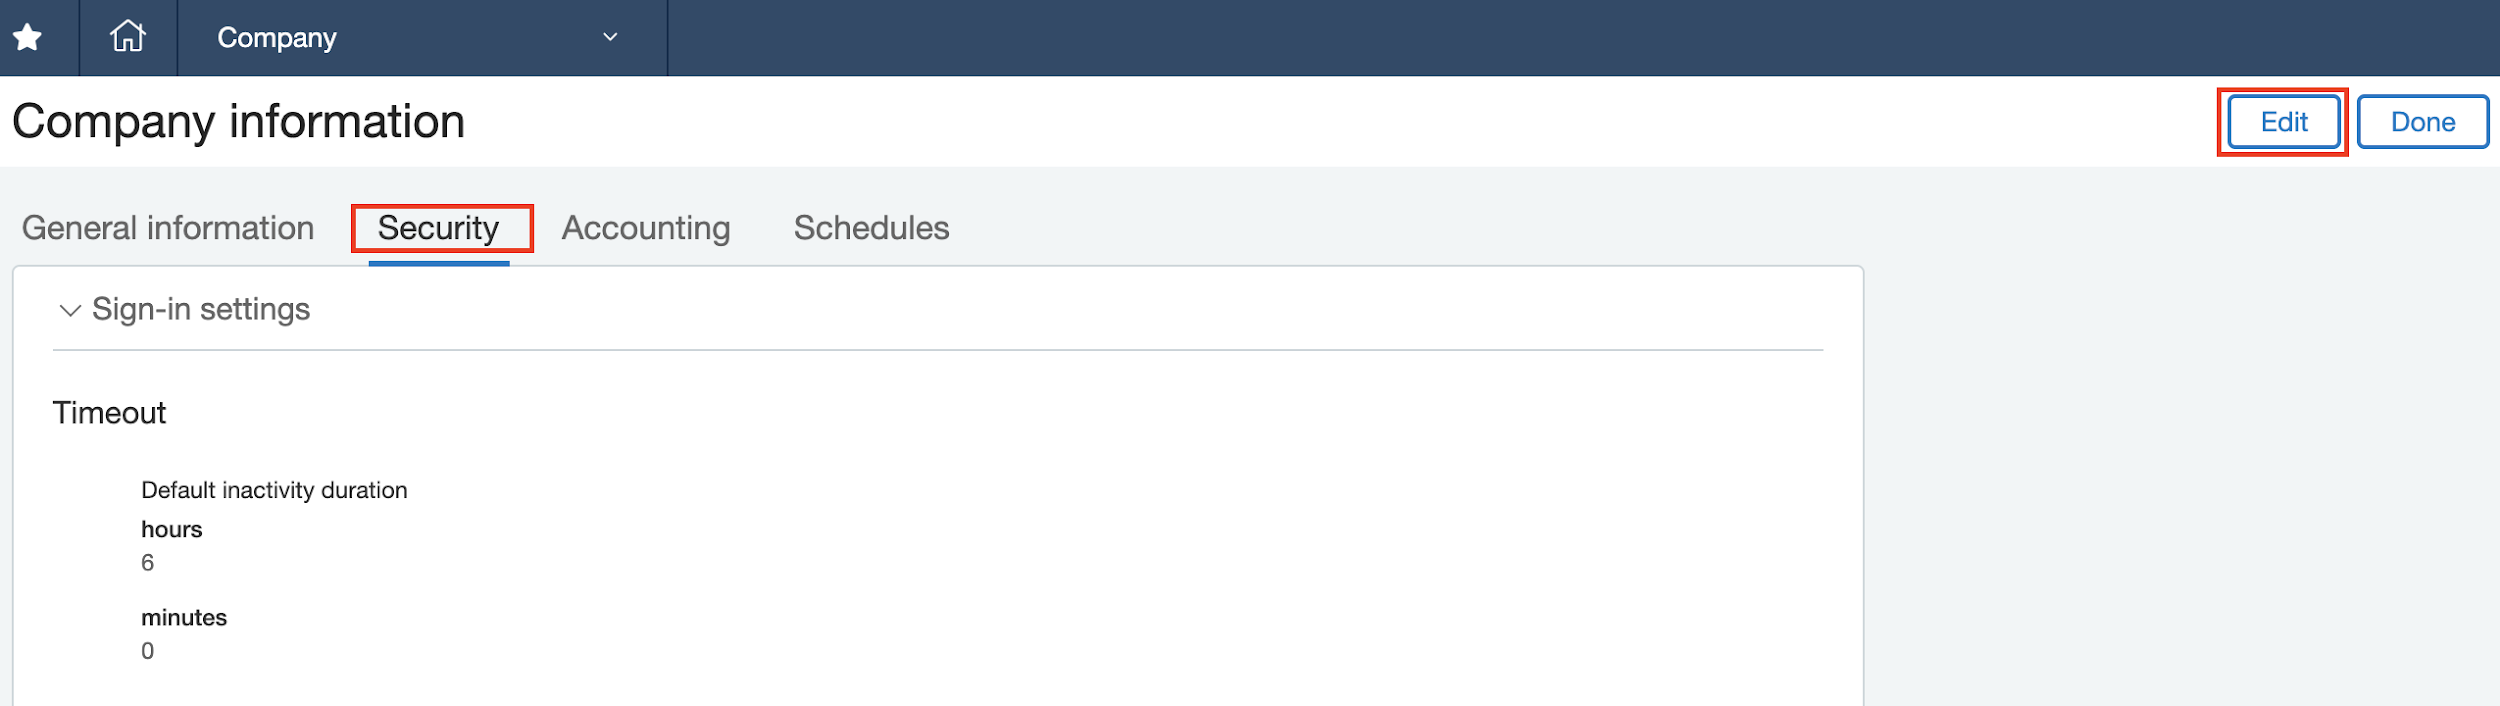
- In the Web Services authorizations click on Add

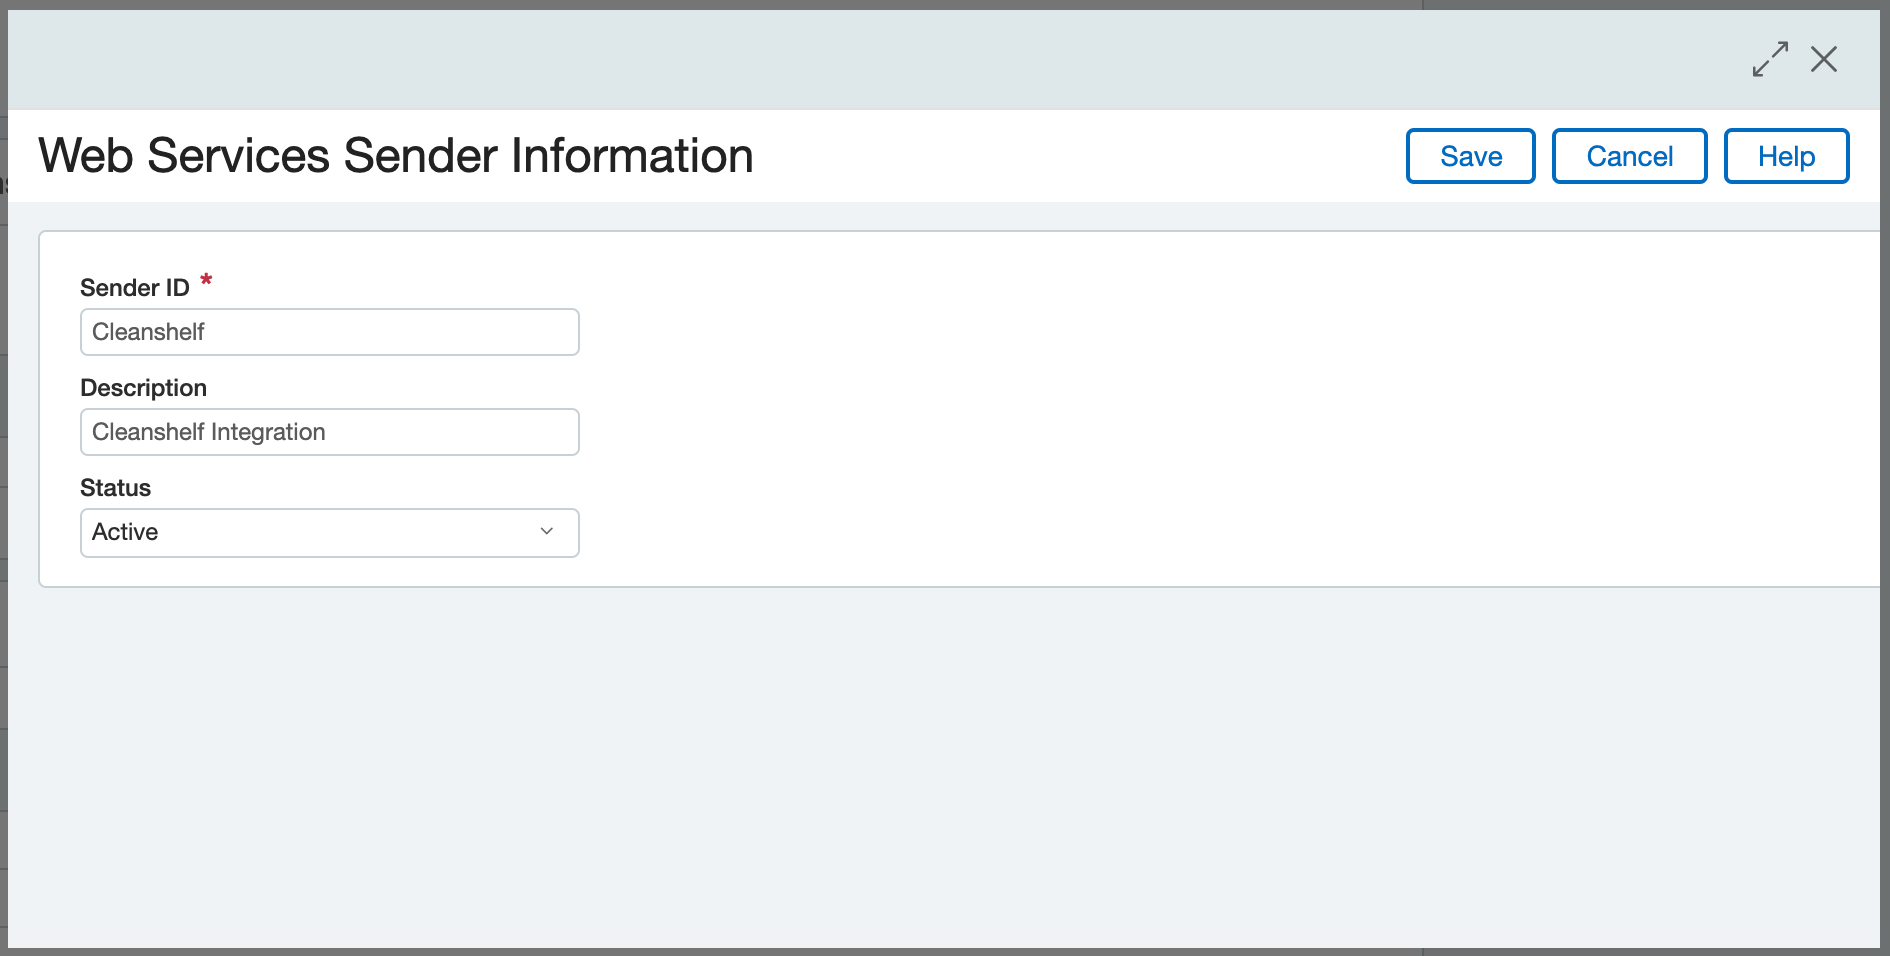
- Enter Sender ID Cleanshelf and click Save
Add new Web Services User
To add new Web Service user:
- Go to Applications \Company \Admin \Web Services Users
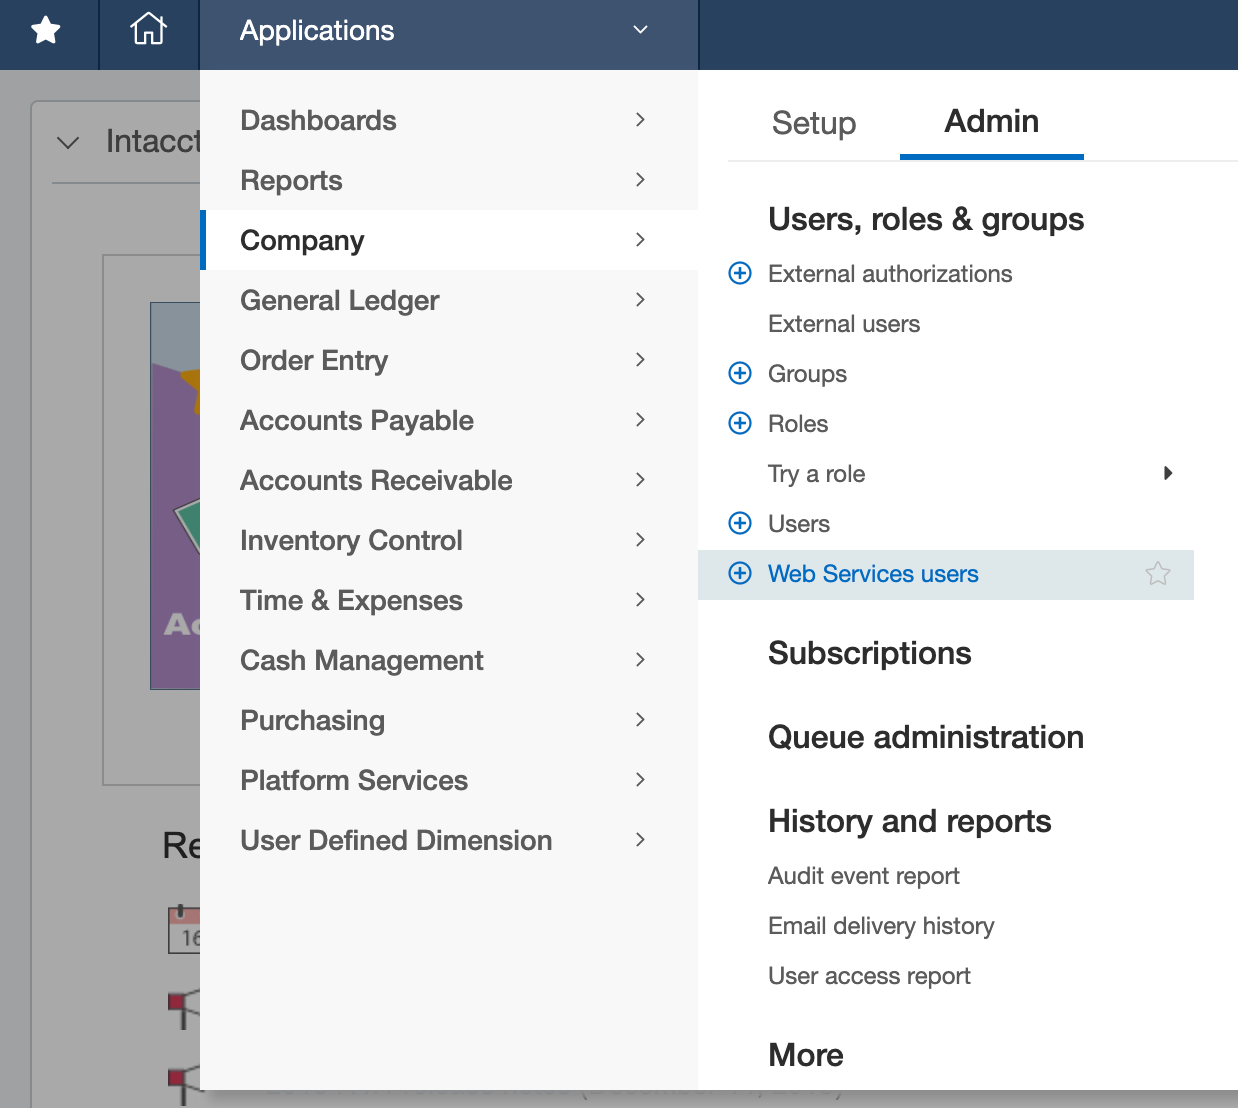
- Click on button Add

- Fill the user information form as shown on the image below:
- For Email address use email that you have control over. You will receive an email with user account details
- Make sure that Full Admin privileges are set
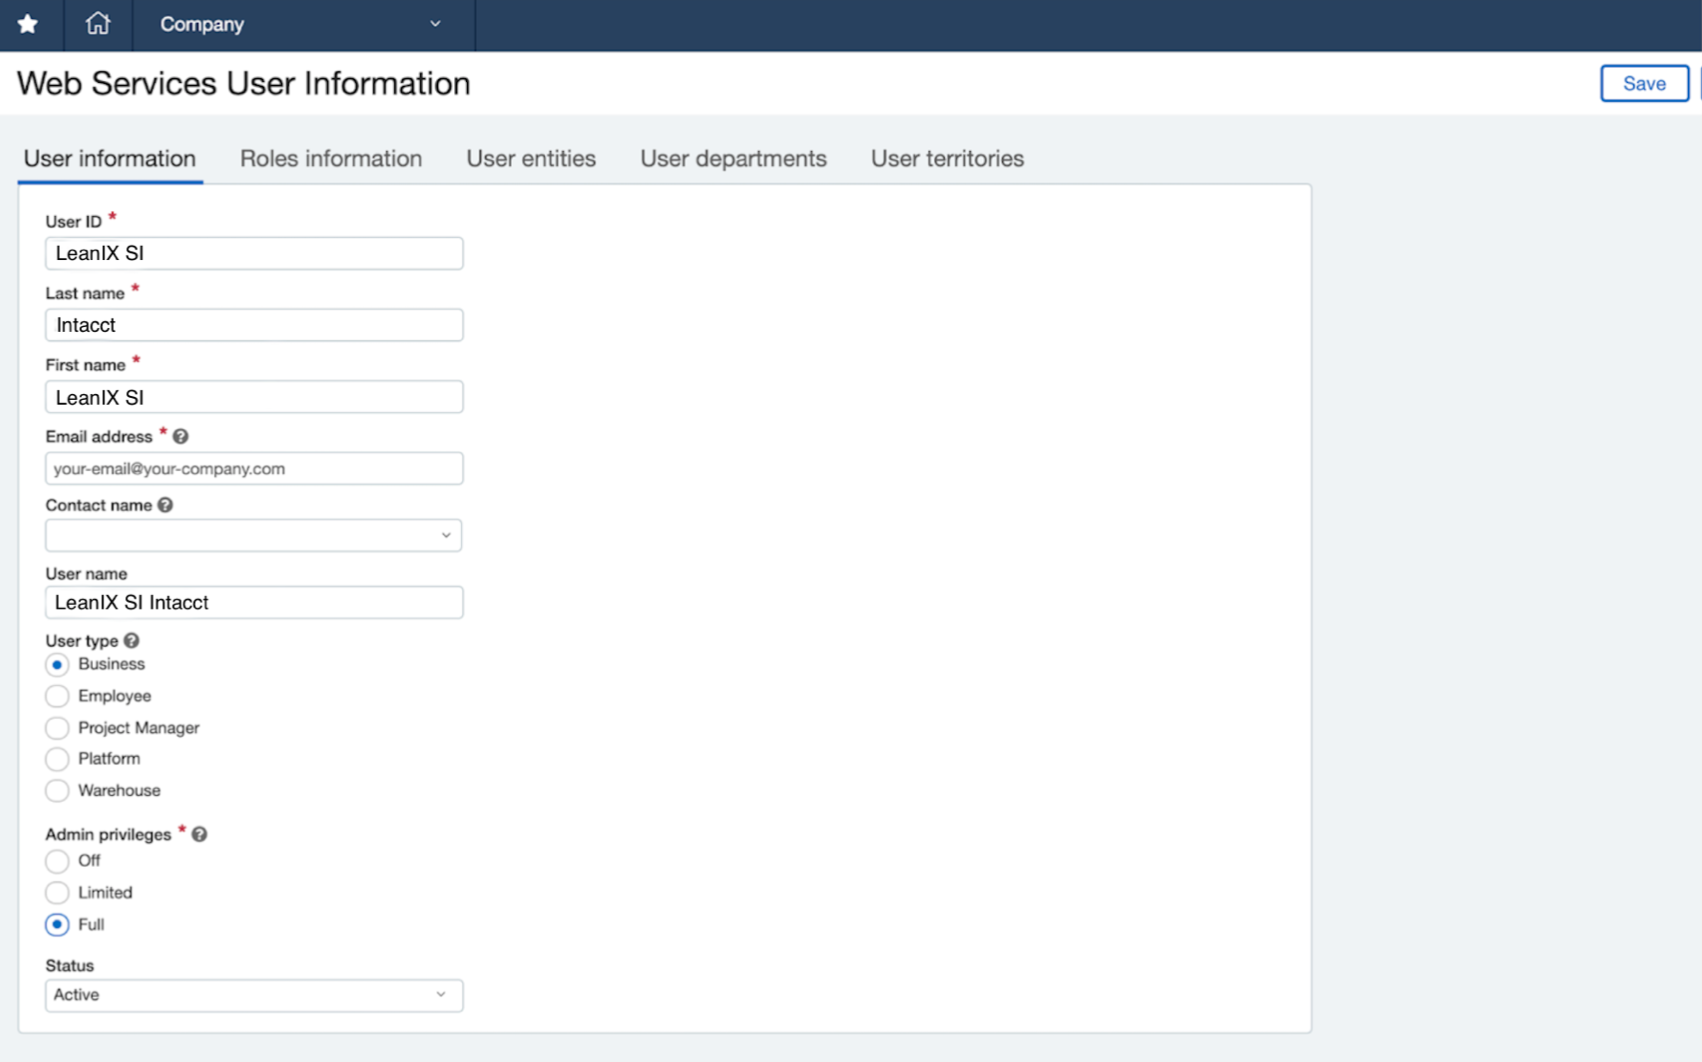
- Click Save on the “Web Services User Information” page to create a user account
You will receive “Welcome to Sage Intacct!” email in your inbox. In that email, you will get credentials you will use to connect to LeanIX SMP.
Configure Intacct integration in LeanIX SMP
- Log into LeanIX SMP and navigate to Intacct settings (https://us-si.leanix.net/#/service/Intacct/settings/ or https://eu-si.leanix.net/#/service/Intacct/settings/)
- Click on the Integrate button and fill out the form with appropriate credentials you received in the email:
- Company ID
- User ID
- Password
Updated 7 days ago