
NetSuite
NetSuite provides a cloud based ERP software suite. NetSuite is an integrated suite of applications for managing accounting, order processing, inventory management, production, supply chain and warehouse operations.
Pricing NetSuite pricing is not public.
Integration Information
Data Collected
- Members: email, name, role (user's role in the organisation)
- Usage:
- number of users
Connection details
- Status: General Availability
- Type: api
- Permissions required:
* The exact procedure how to create credentials and what permissions are required is provided in the instructions.
Instructions
You can connect to NetSuite via token-based authentication. In order to do so, you need to generate an account ID, consumer key, and consumer secret as well as a token ID and token secret.
Contents
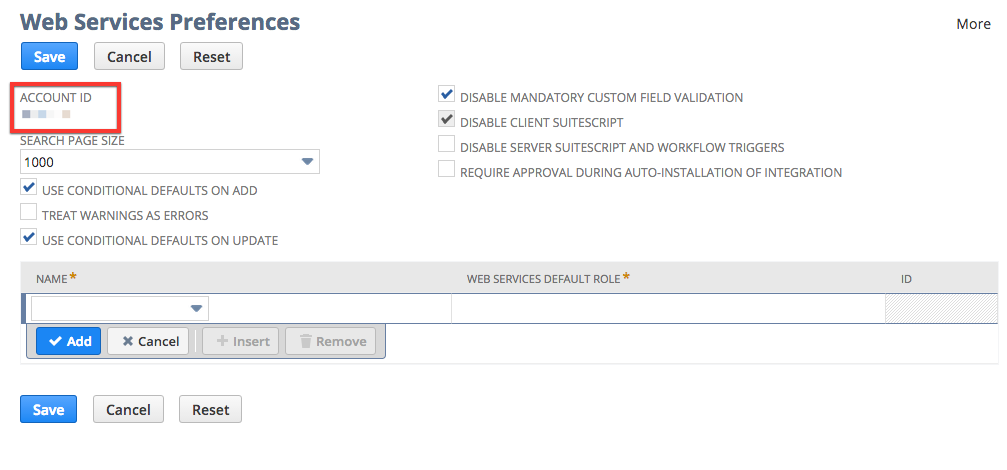
NetSuite Account ID
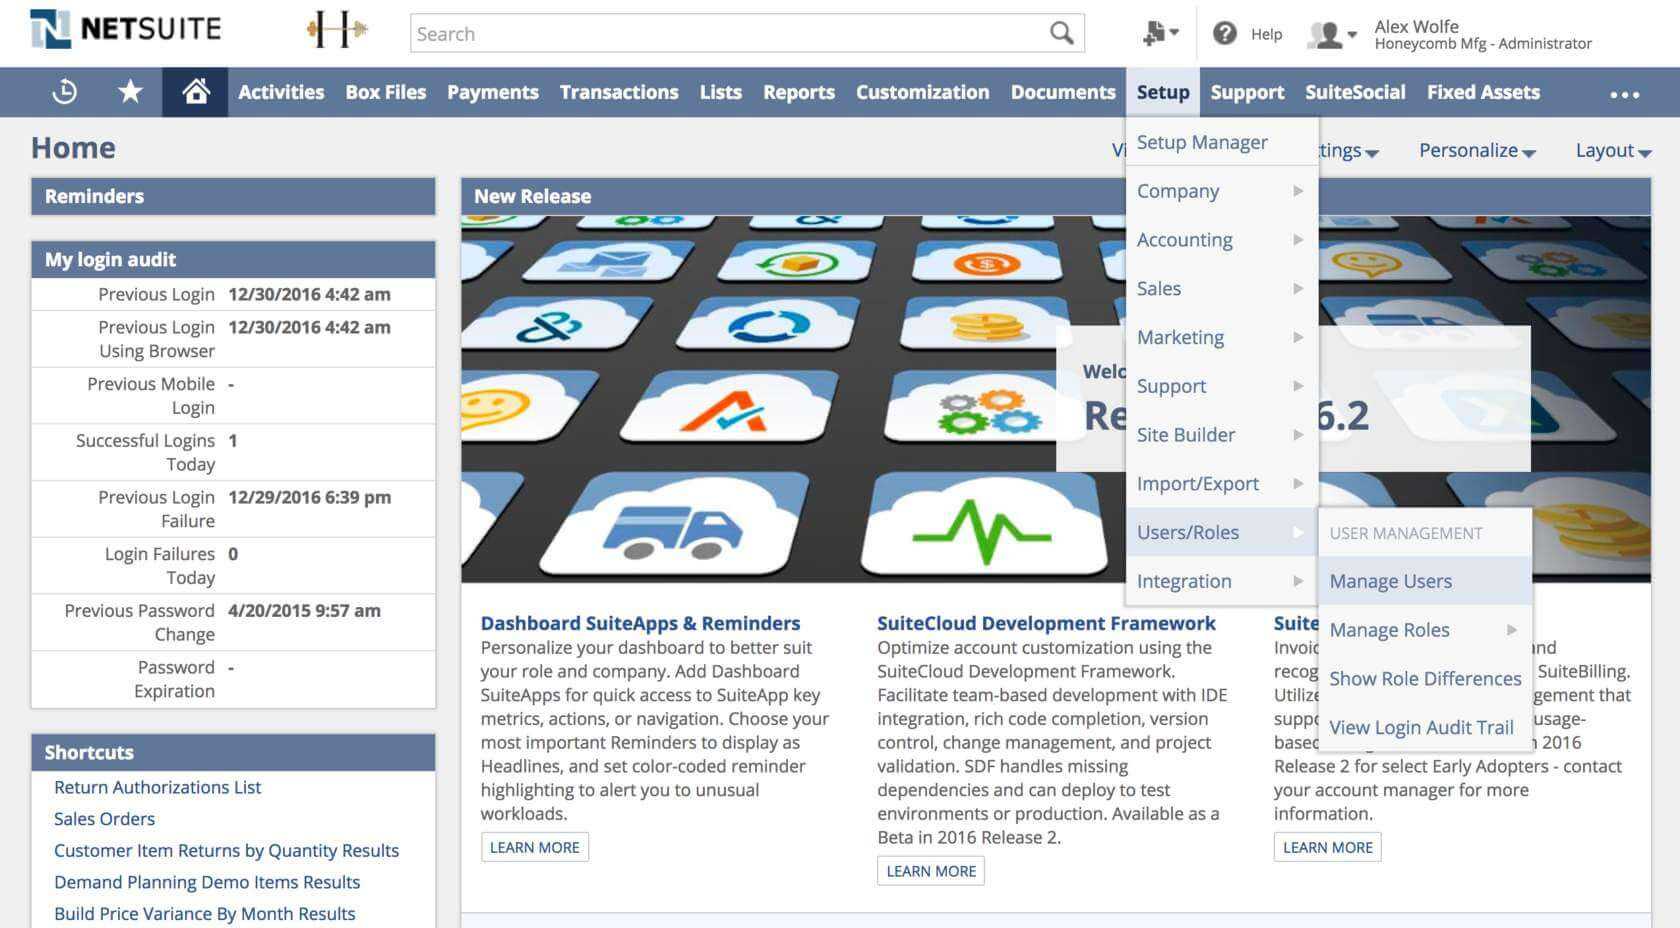
- Login to NetSuite
- Navigate to Setup \Integration \Web Services Preferences (link)
- Copy and save your Account ID as shown below:
Enable Token-Based Authentication
API Access and Token-based Authentication needs to be enabled in NetSuite
- Navigate to Setup \Company \Enable Features (link).
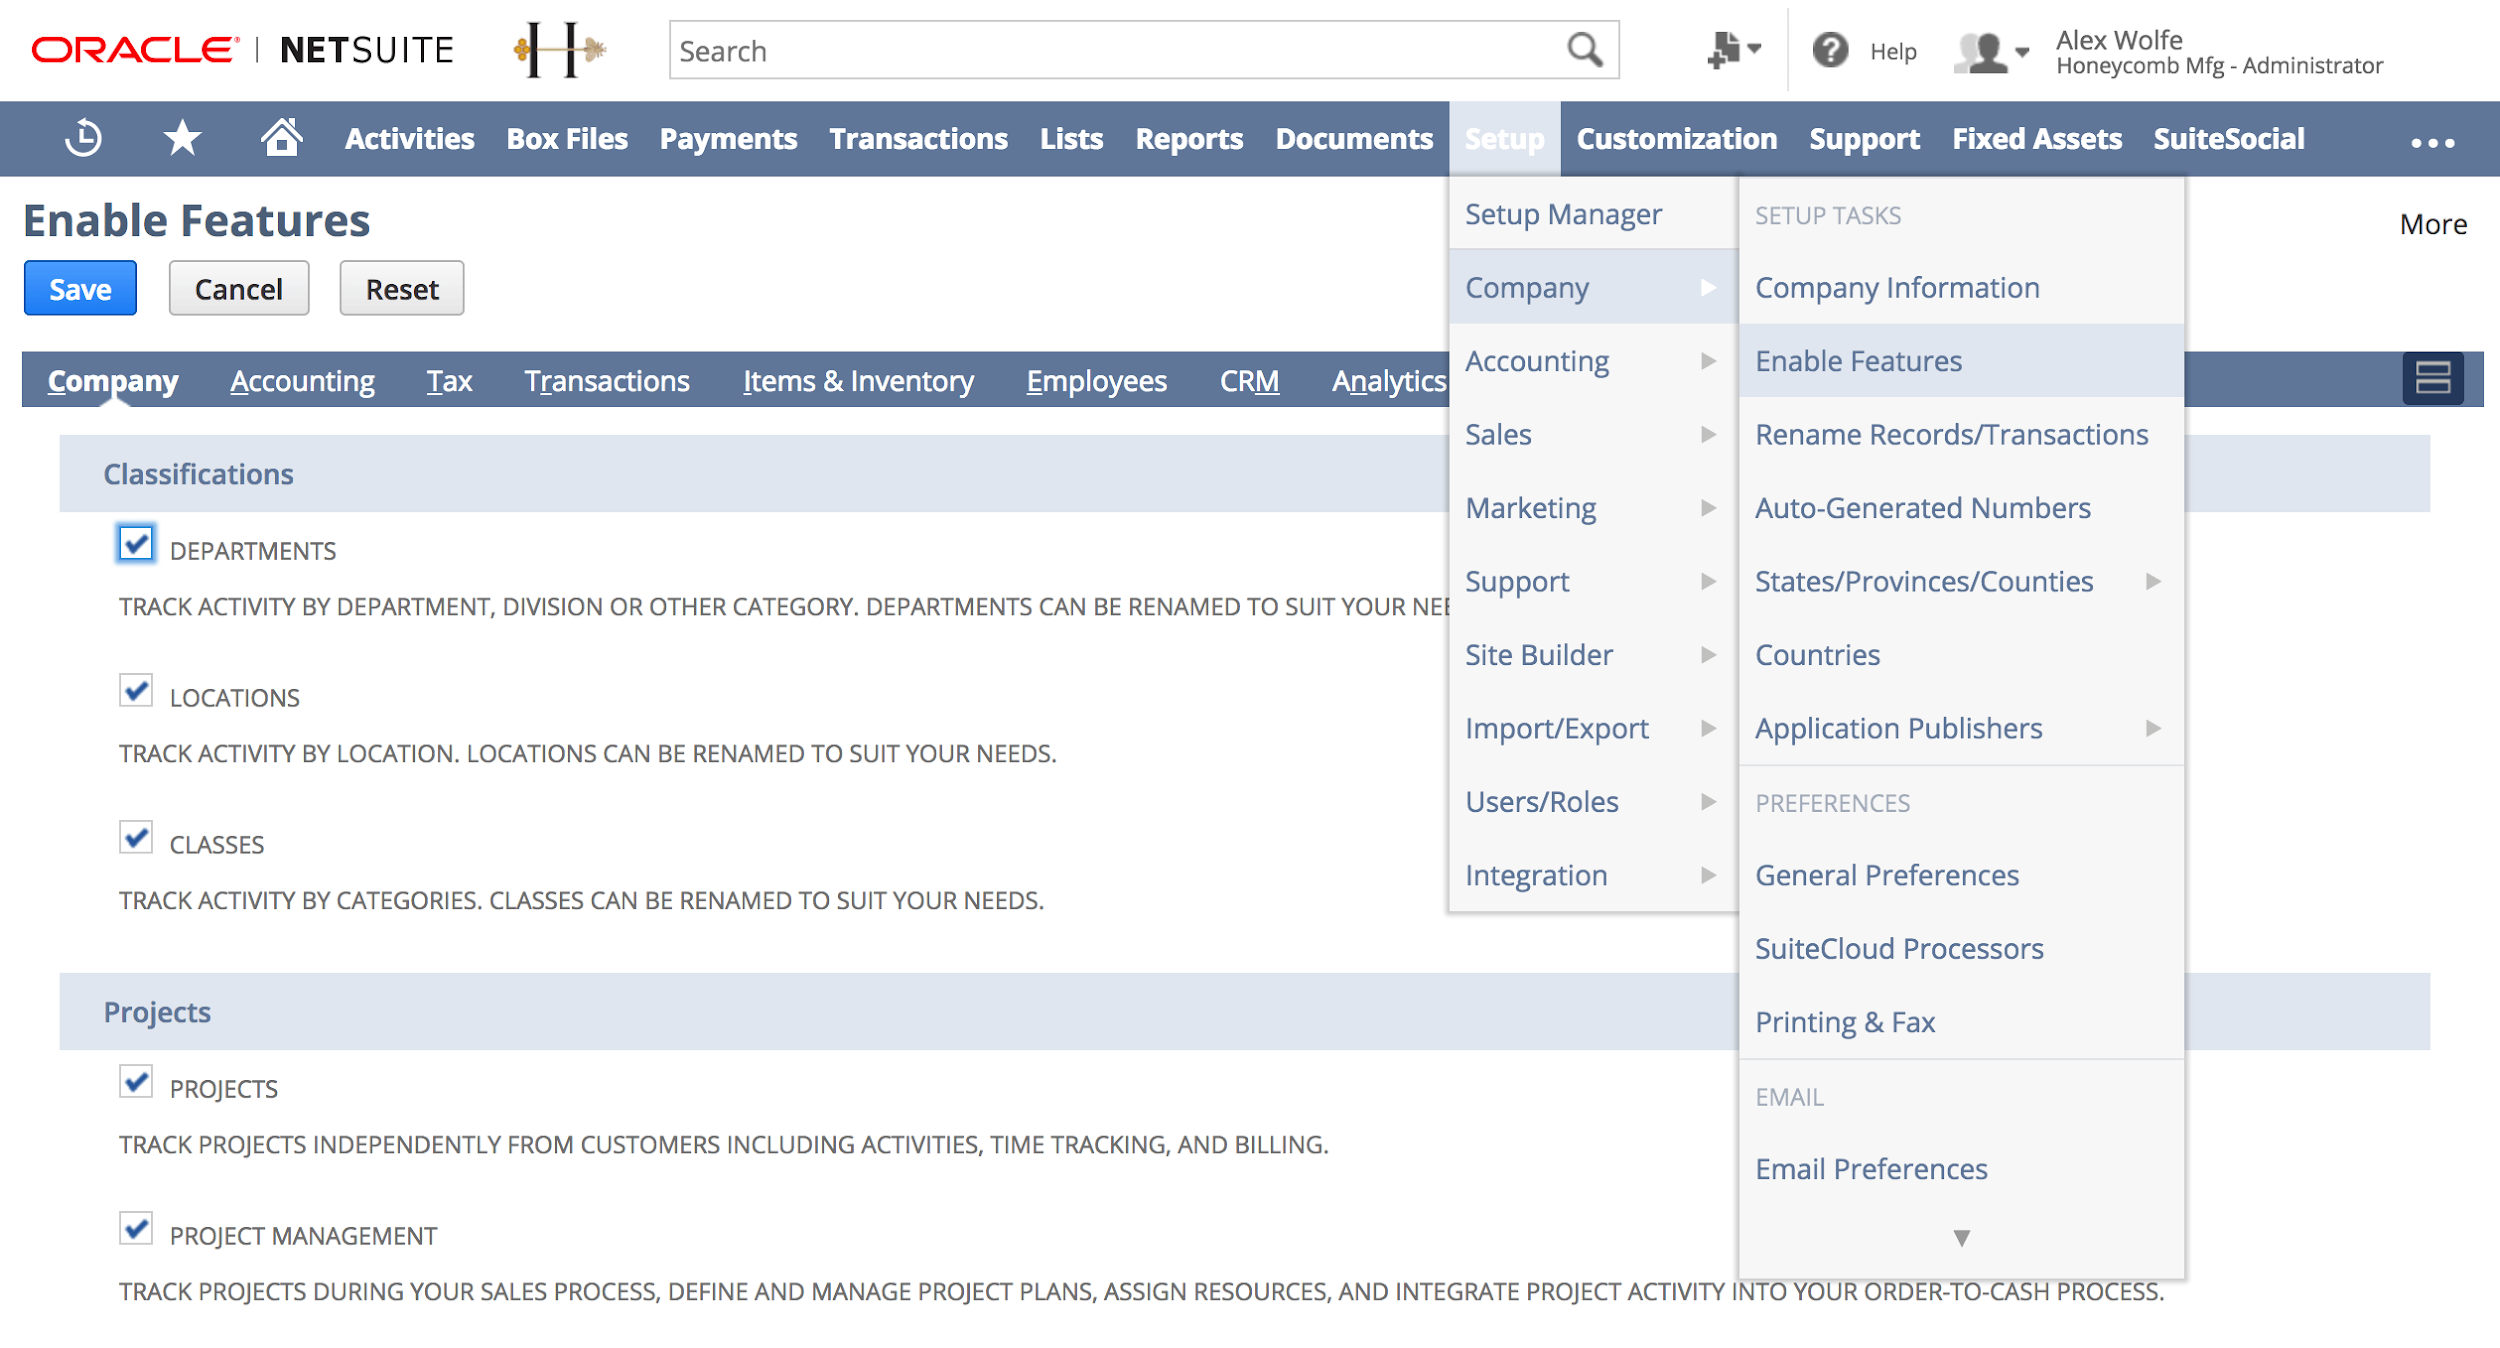
- Select the SuiteCloud tab
- Scroll down to Manage authentication.
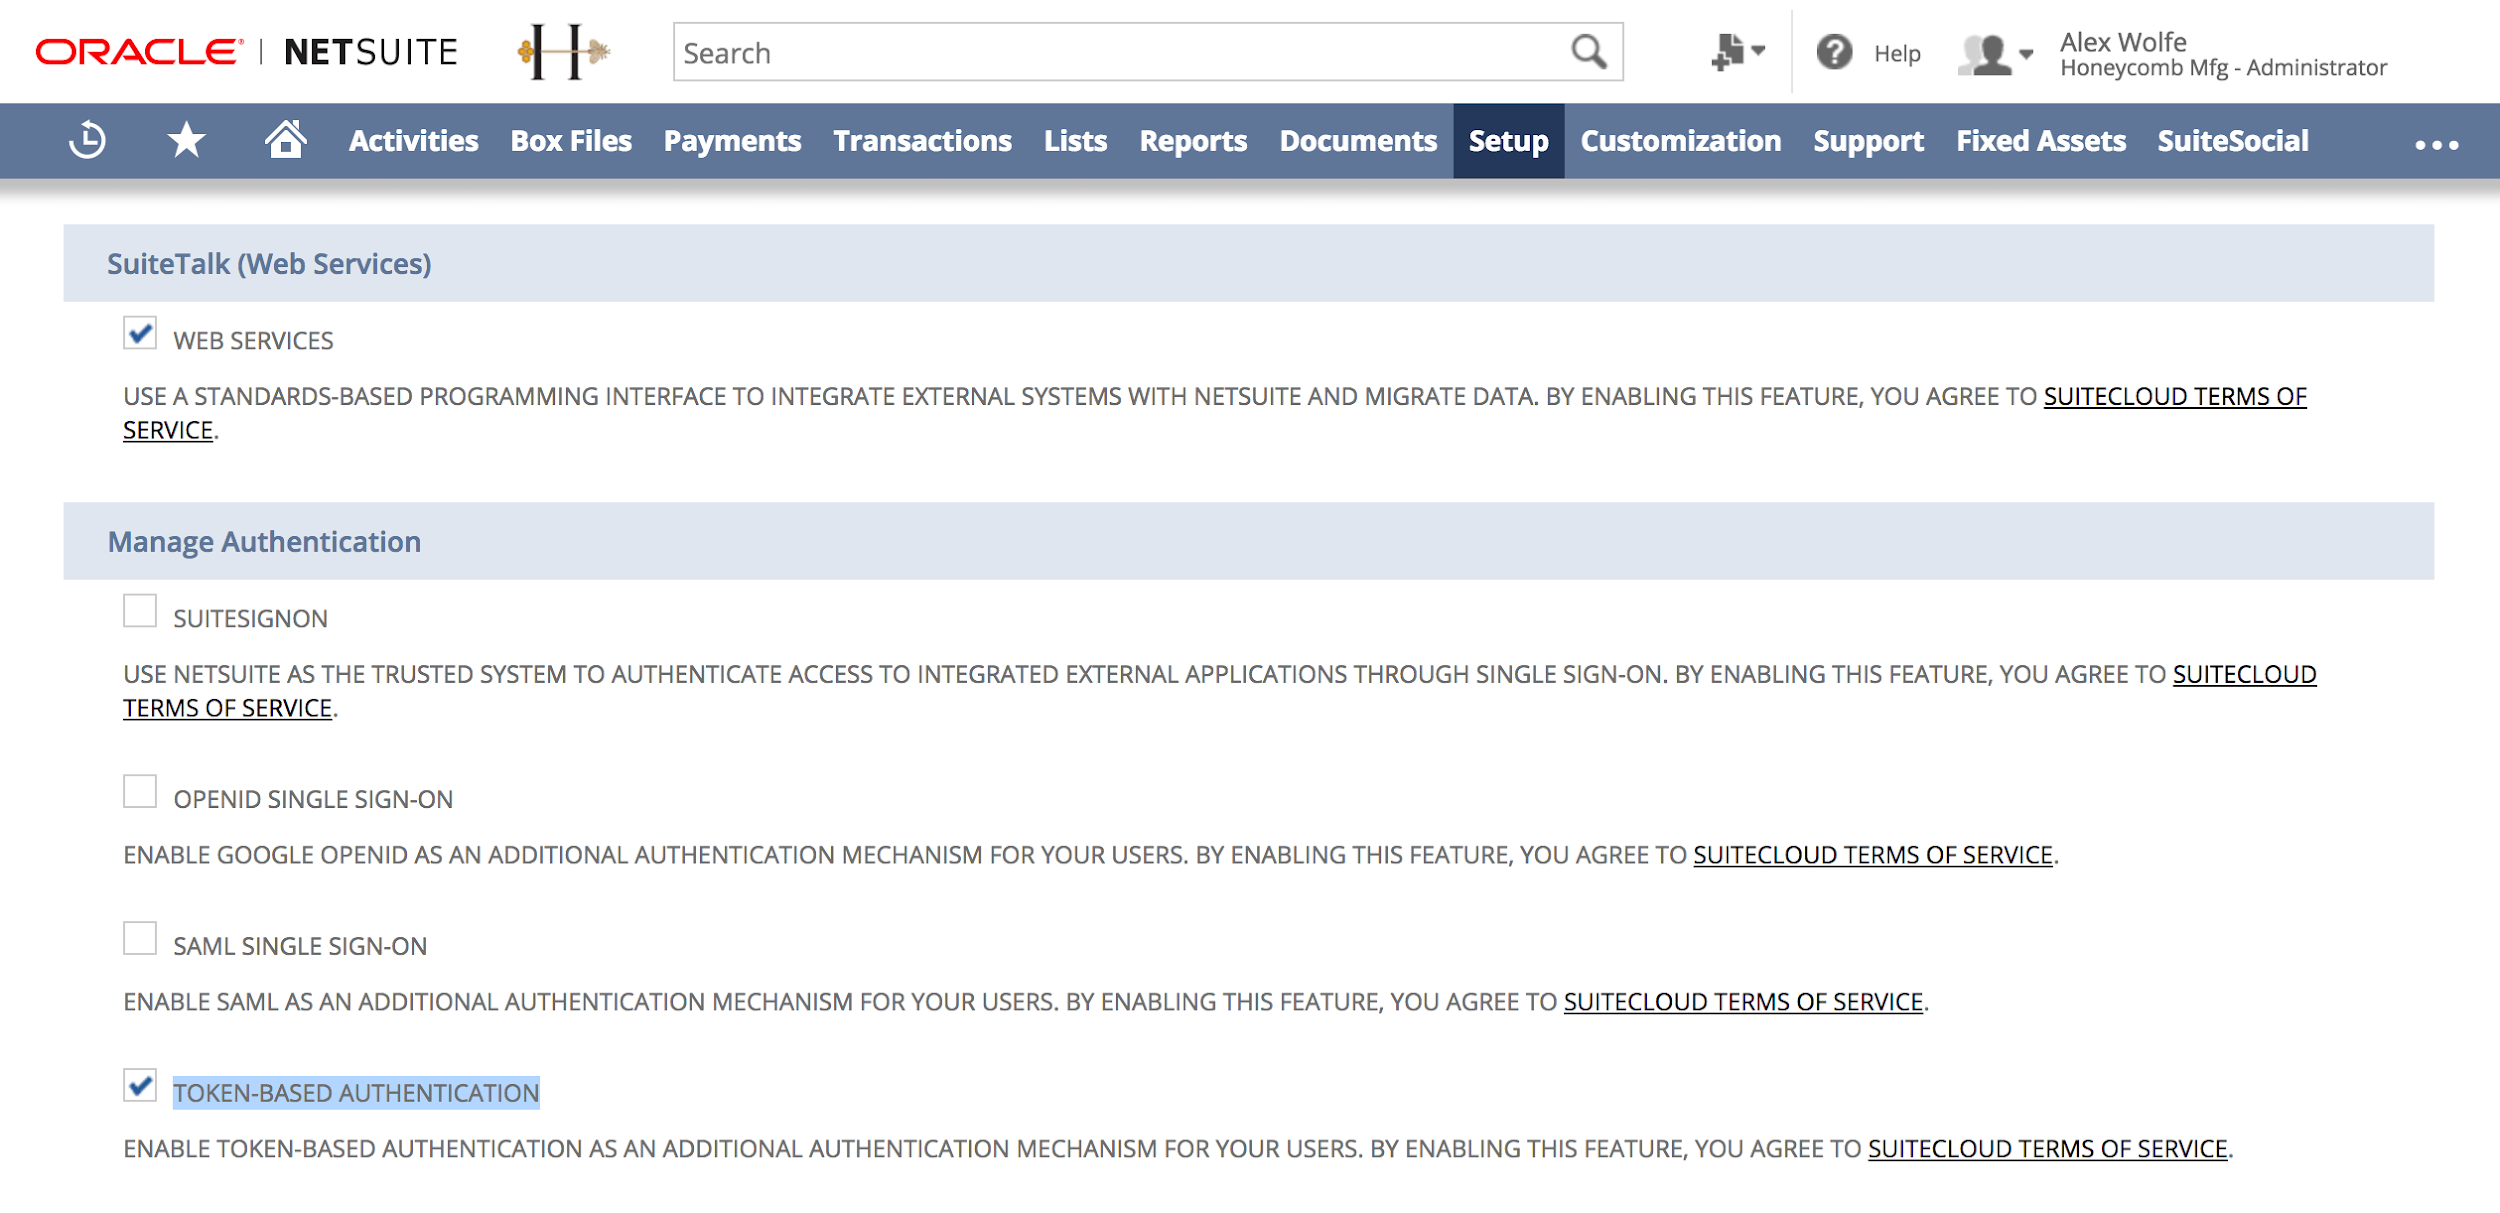
- Enable Token-based authentication
- Save the configuration.
Create an Integration Role
We recommend creating a separate integration role specific to the LeanIX SMP integration. This integration role must have permissions to retrieve employees. This integration role must have the ability to login through web services. This role can then be assigned to the integration user.
- Navigate to Setup \User/Roles \Manage Roles \New (link)
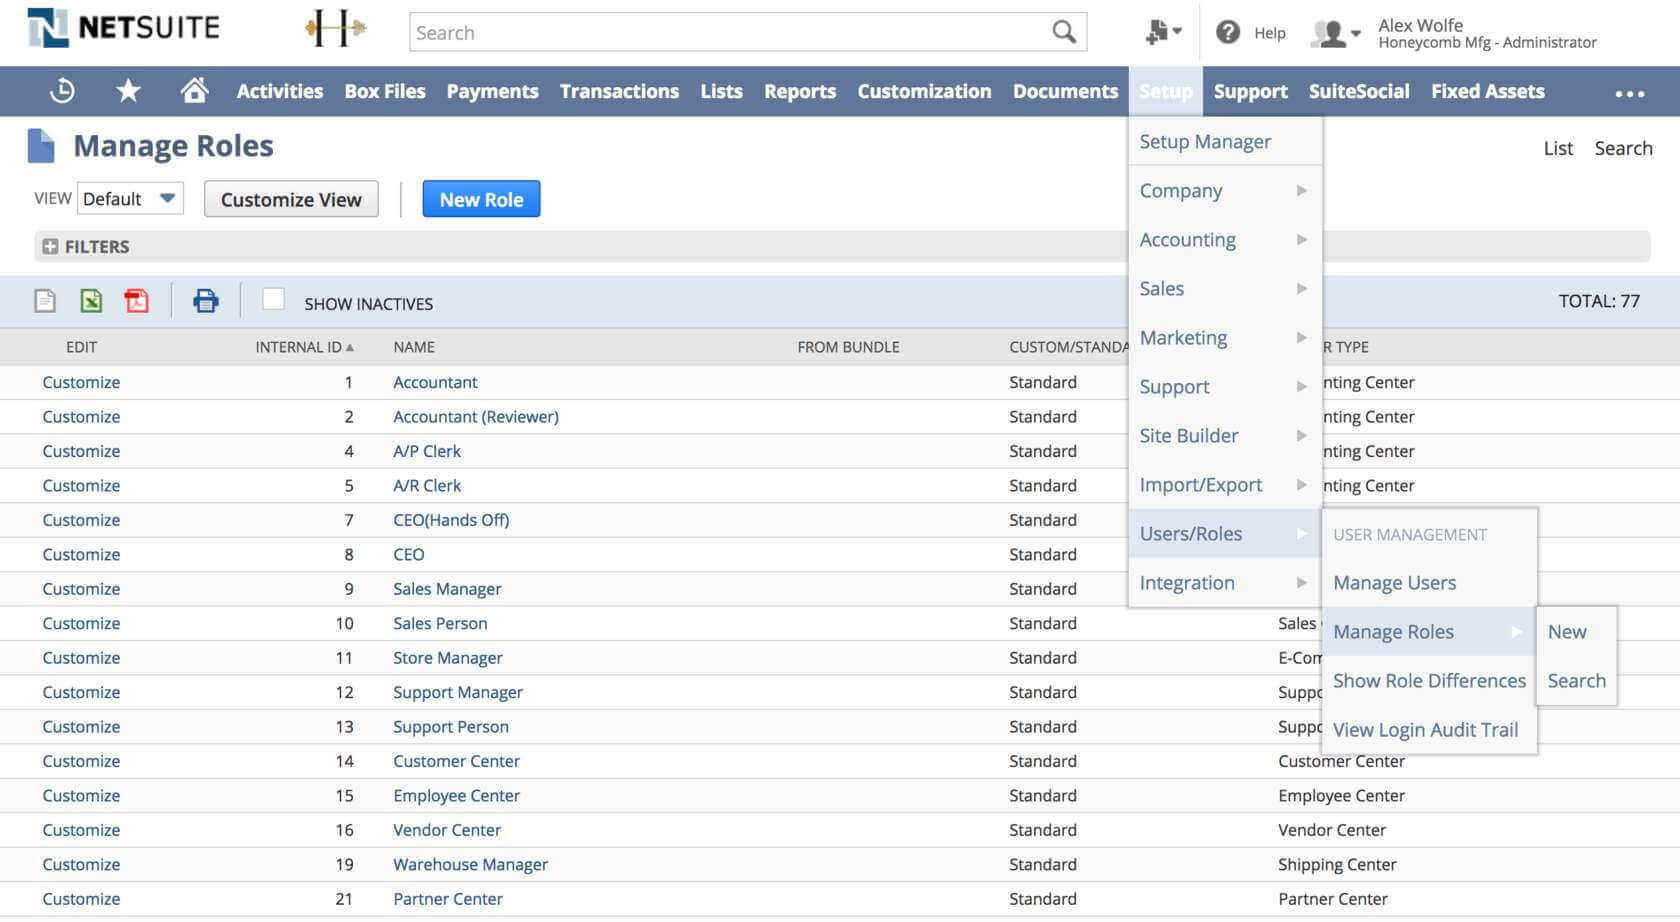
- Enter role name “LeanIX SMP integration” and enable “Web services only role”
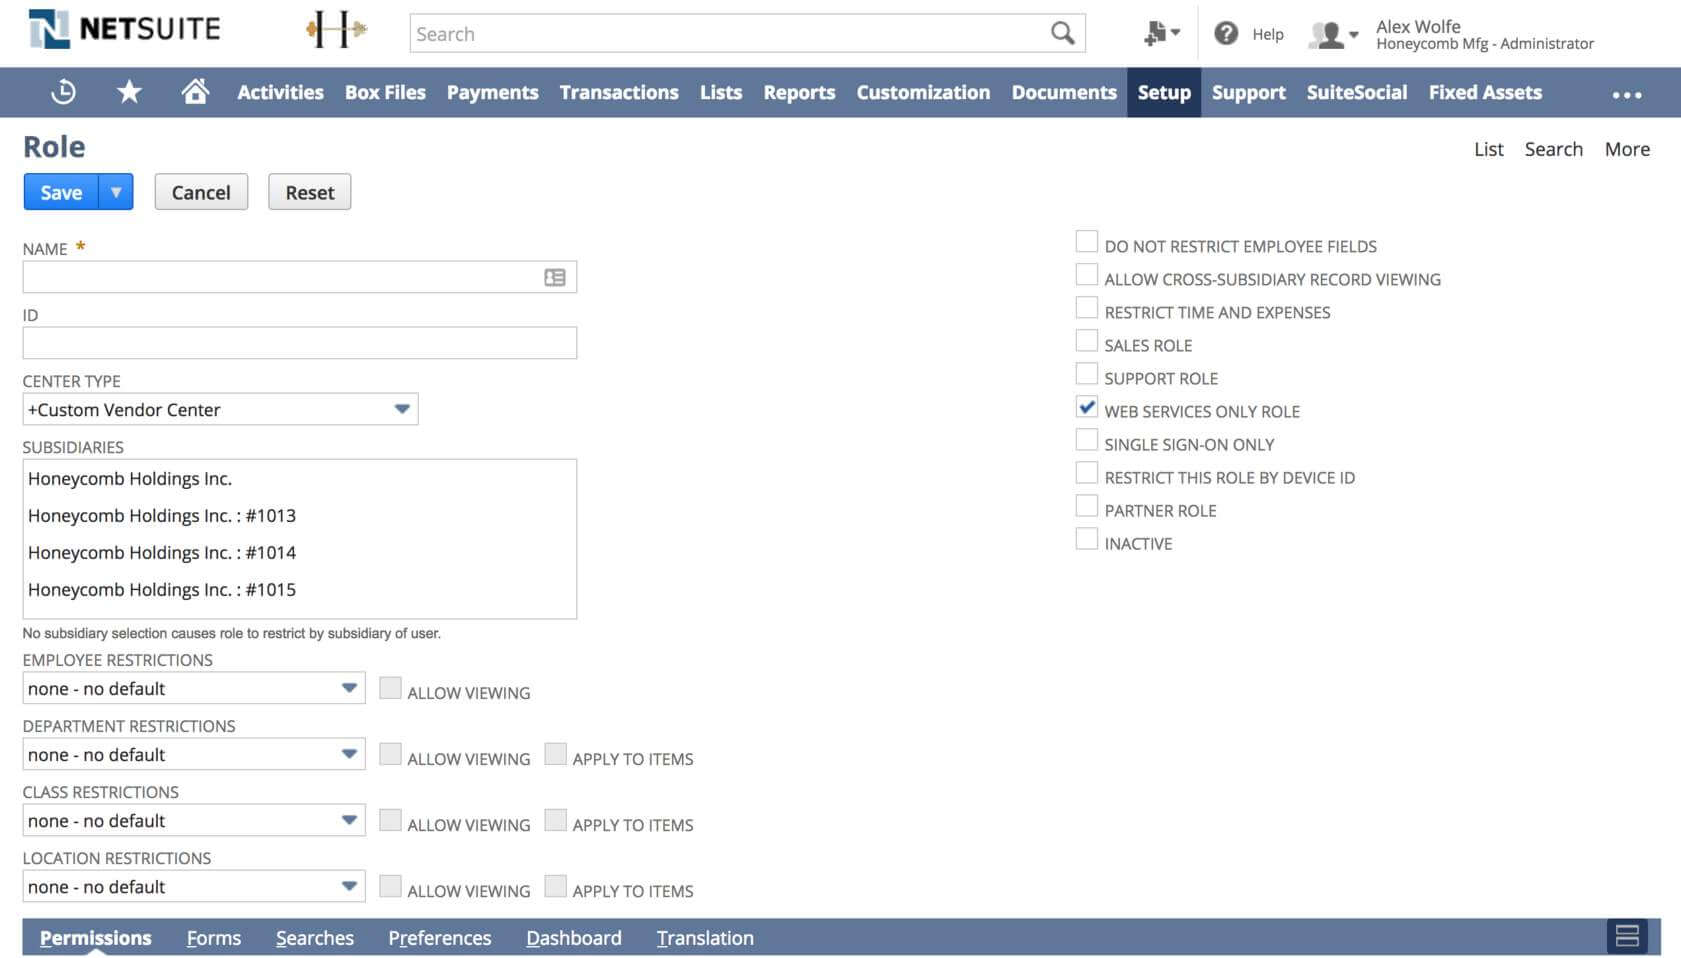
- Under Permissions \Transactions, Permissions Lists and Permissions \Setup, add the permissions listed in the table below
| Sub-tab | Permission | Level | |---------|------------------------|-------| | Lists | Employees | View | | Lists | Employee Record | View | | Lists | Departments | View | | Setup | Web Services | Full | | Setup | User Access Token | Full | | Setup | View Login Audit Trail | View | - Save the new role
Setup an Integration User
Once you've set up our integration role (LeanIX SMP integration), you need to assign this role to your integration user. We recommend creating a separate user for your integrations.
- Navigate to Lists \Employees \Employees \New
- Enter a new user name “LeanIX SMP User”
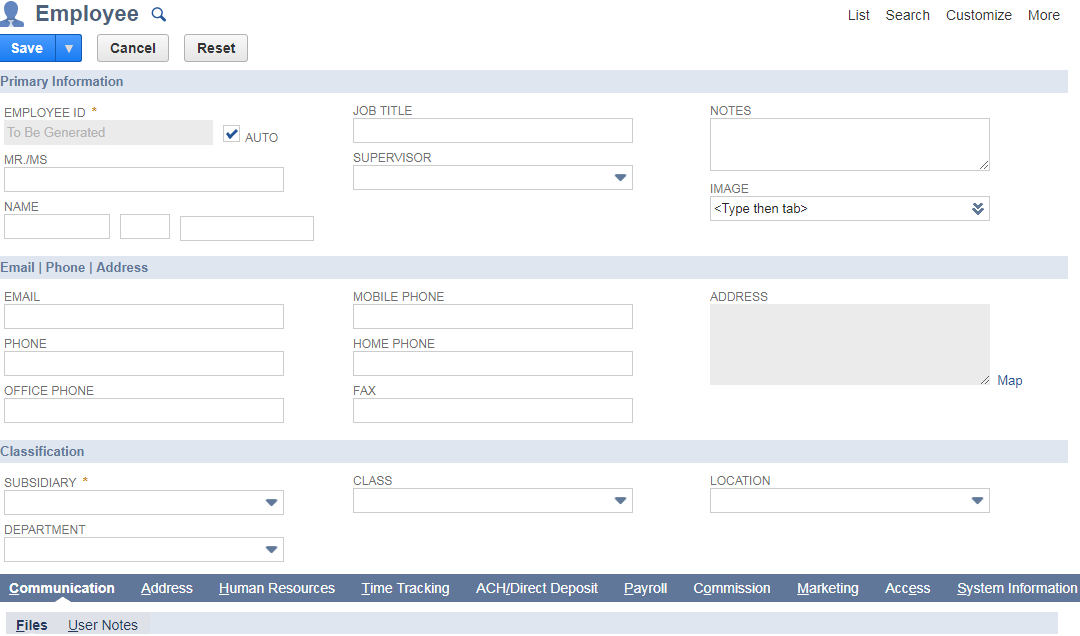
- Navigate to the Access tab and check off “GIVE ACCESS”
- Assign the newly created role (LeanIX SMP integration)
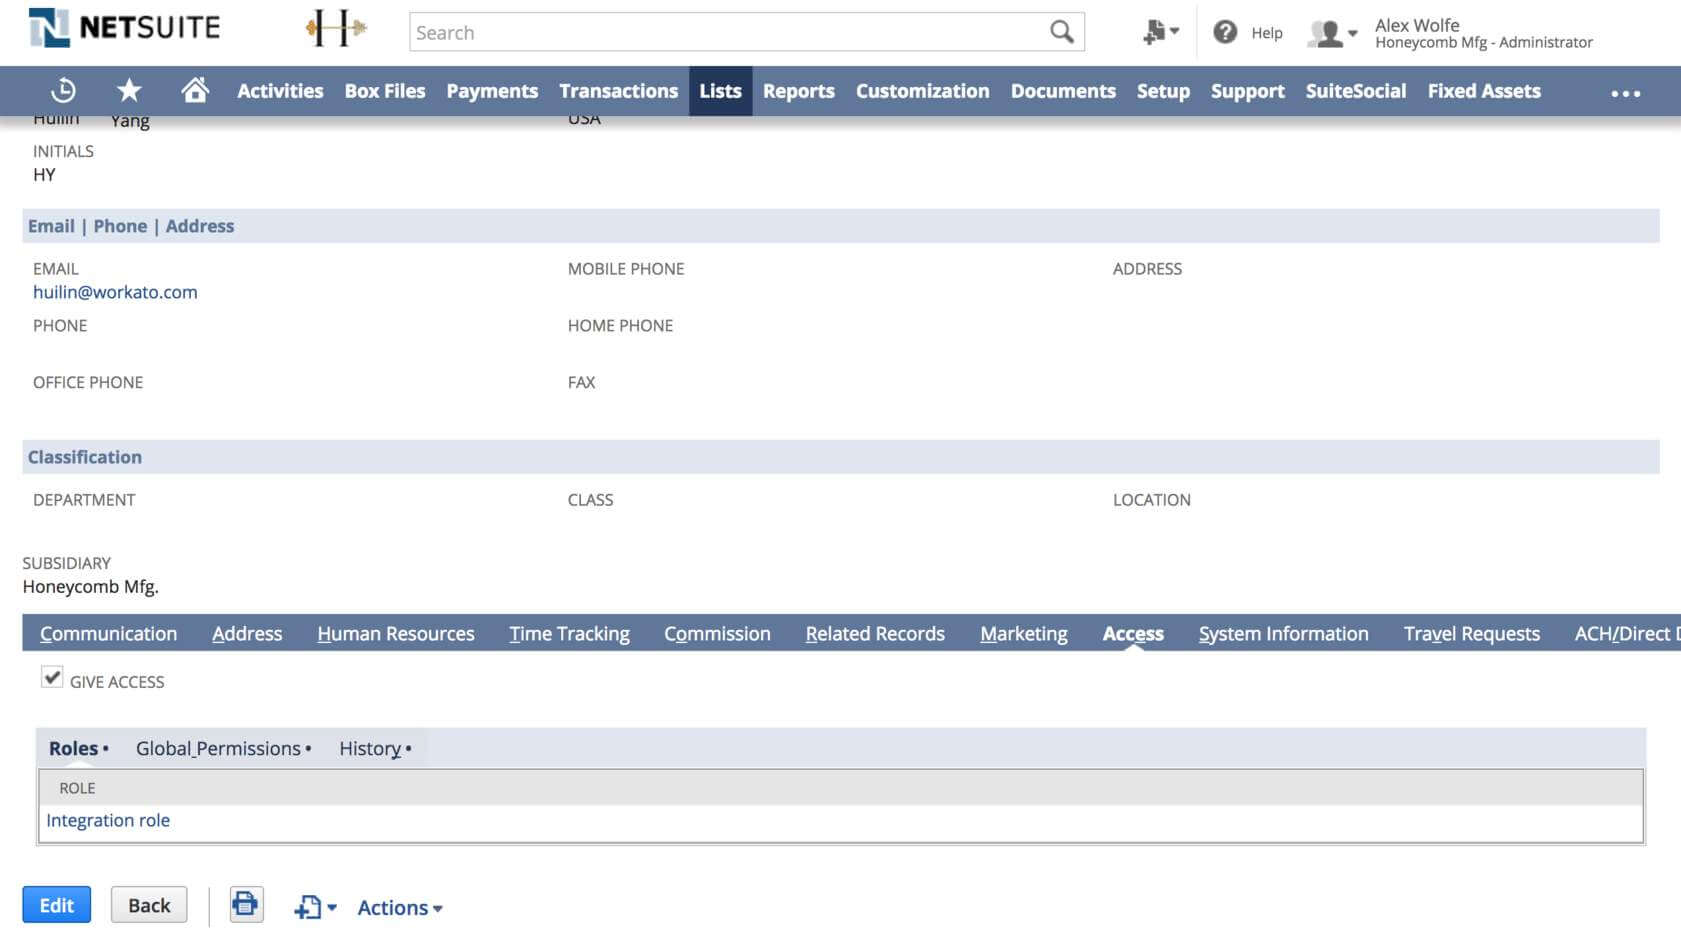
- Save the new user
Create an Integration Record
You need to create an integration record to represent the LeanIX SMP application connecting to NetSuite.
- Go to Setup \Integration \Manage Integrations \New.
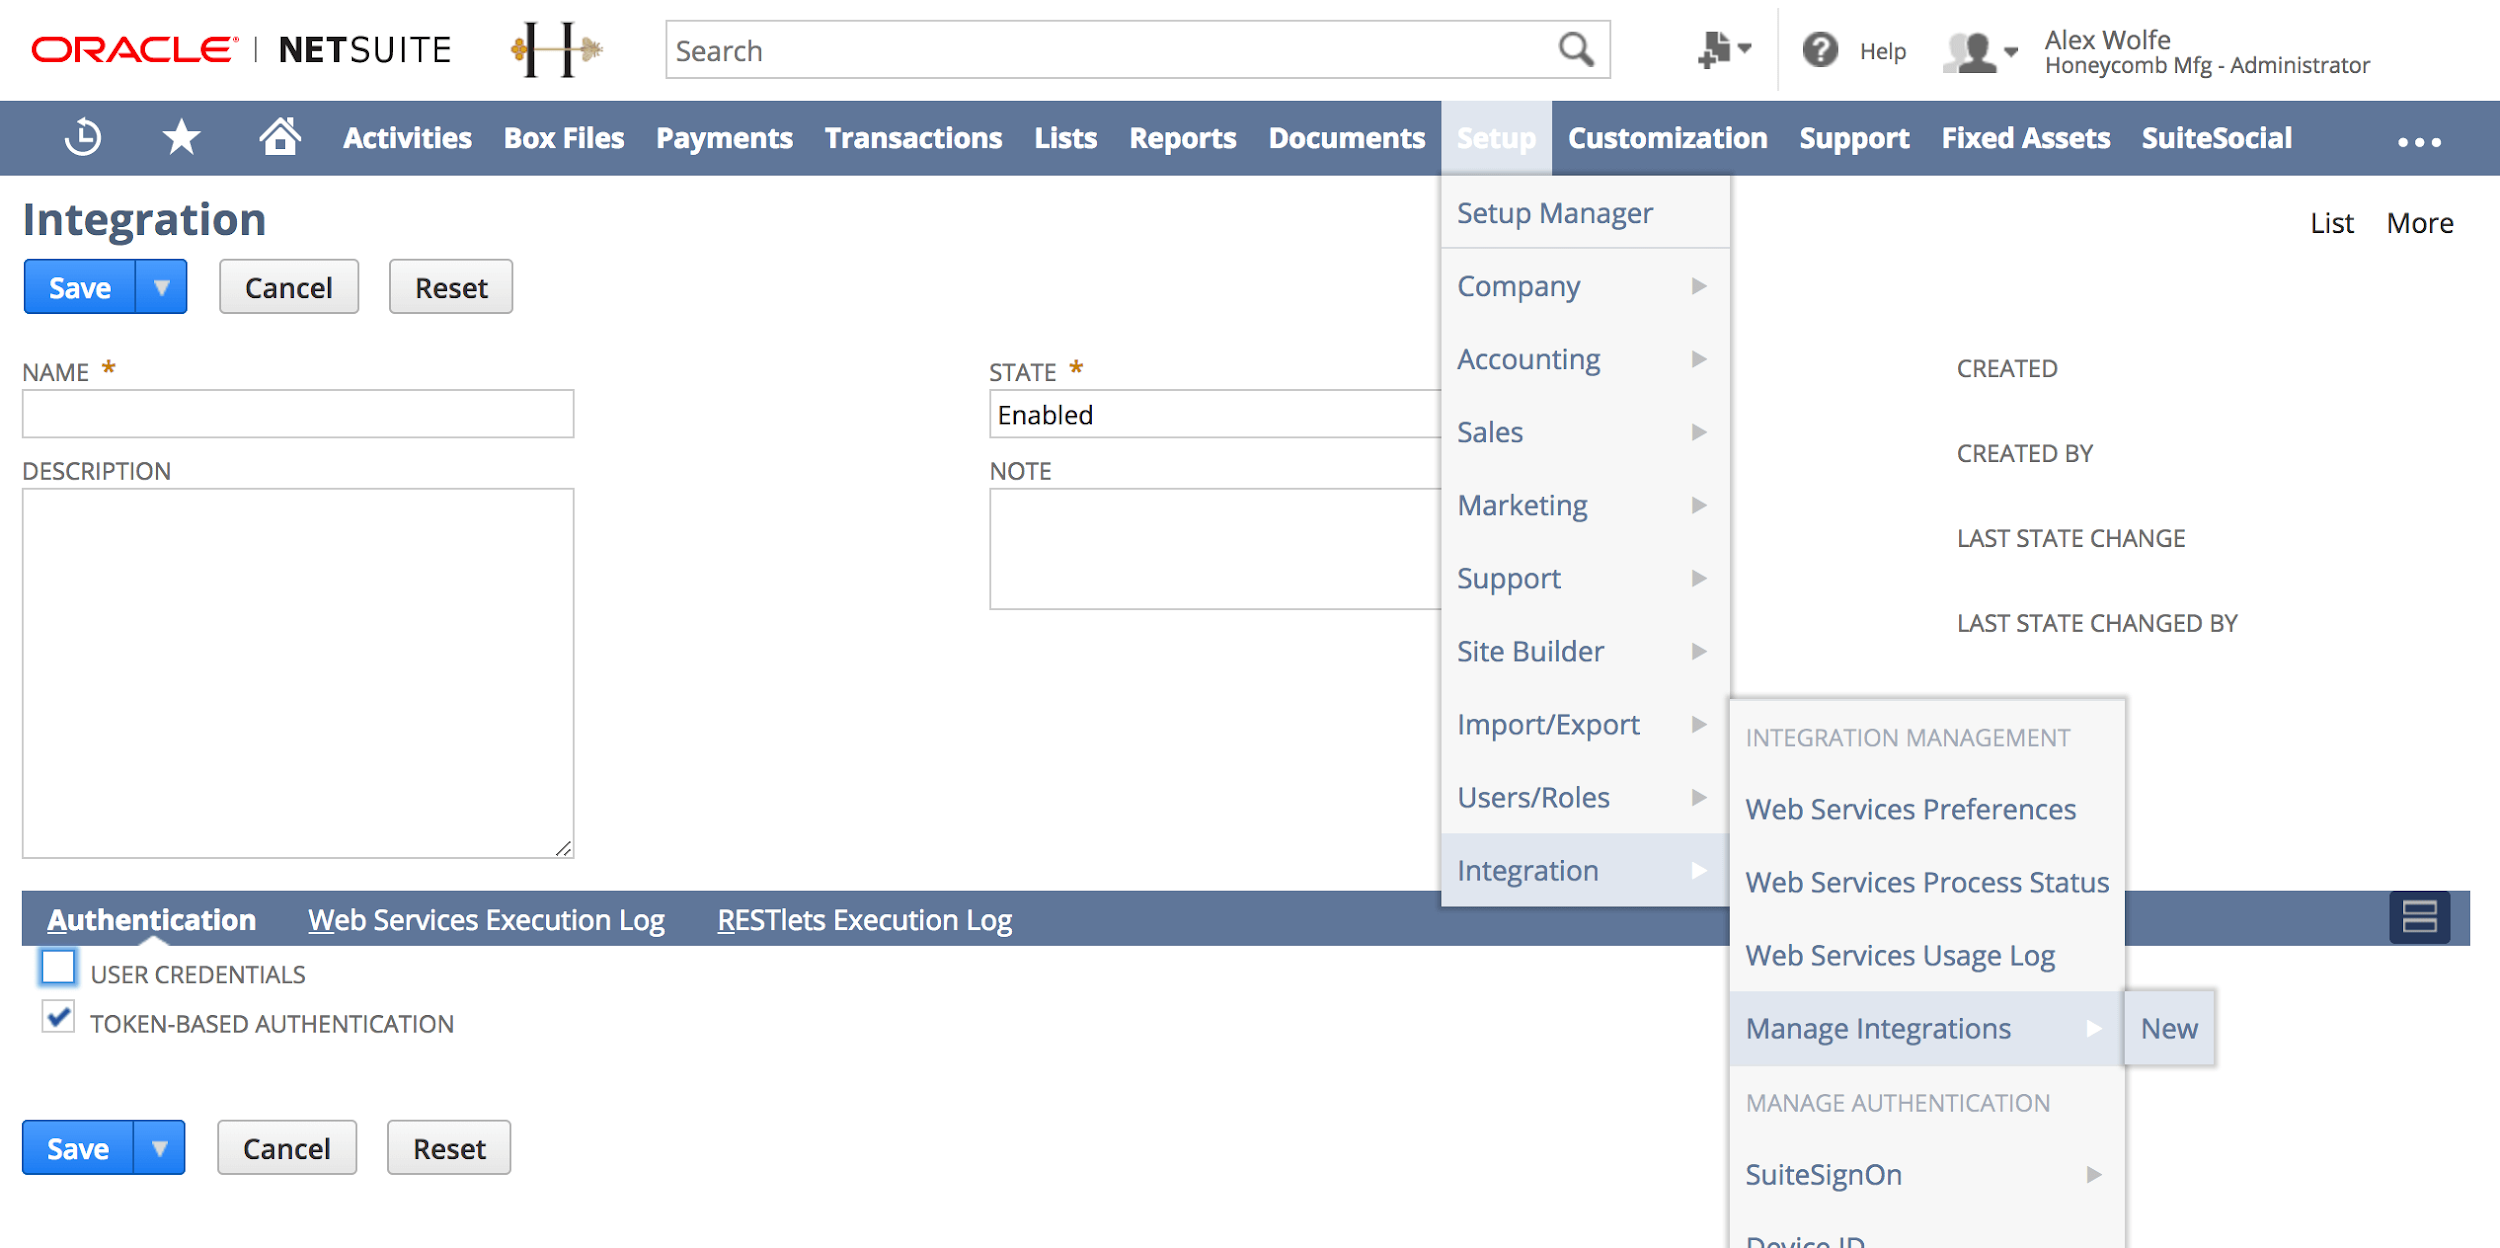
- Add a name for this integration “LeanIX SMP”
- Select Enabled in the State pick list
- Check the Token-based Authentication checkbox on the Authentication subtab
- Save this integration
- Now that we have created an integration record, save the consumer key and consumer secret. You’ll enter this into LeanIX SMP to connect NetSuite later
Create Access Token
The next step is to create an Integration record in NetSuite and to generate the authentication information needed to allow LeanIX SMP to integrate.
- Go to Setup \Users/Roles \Access Tokens \New (link)
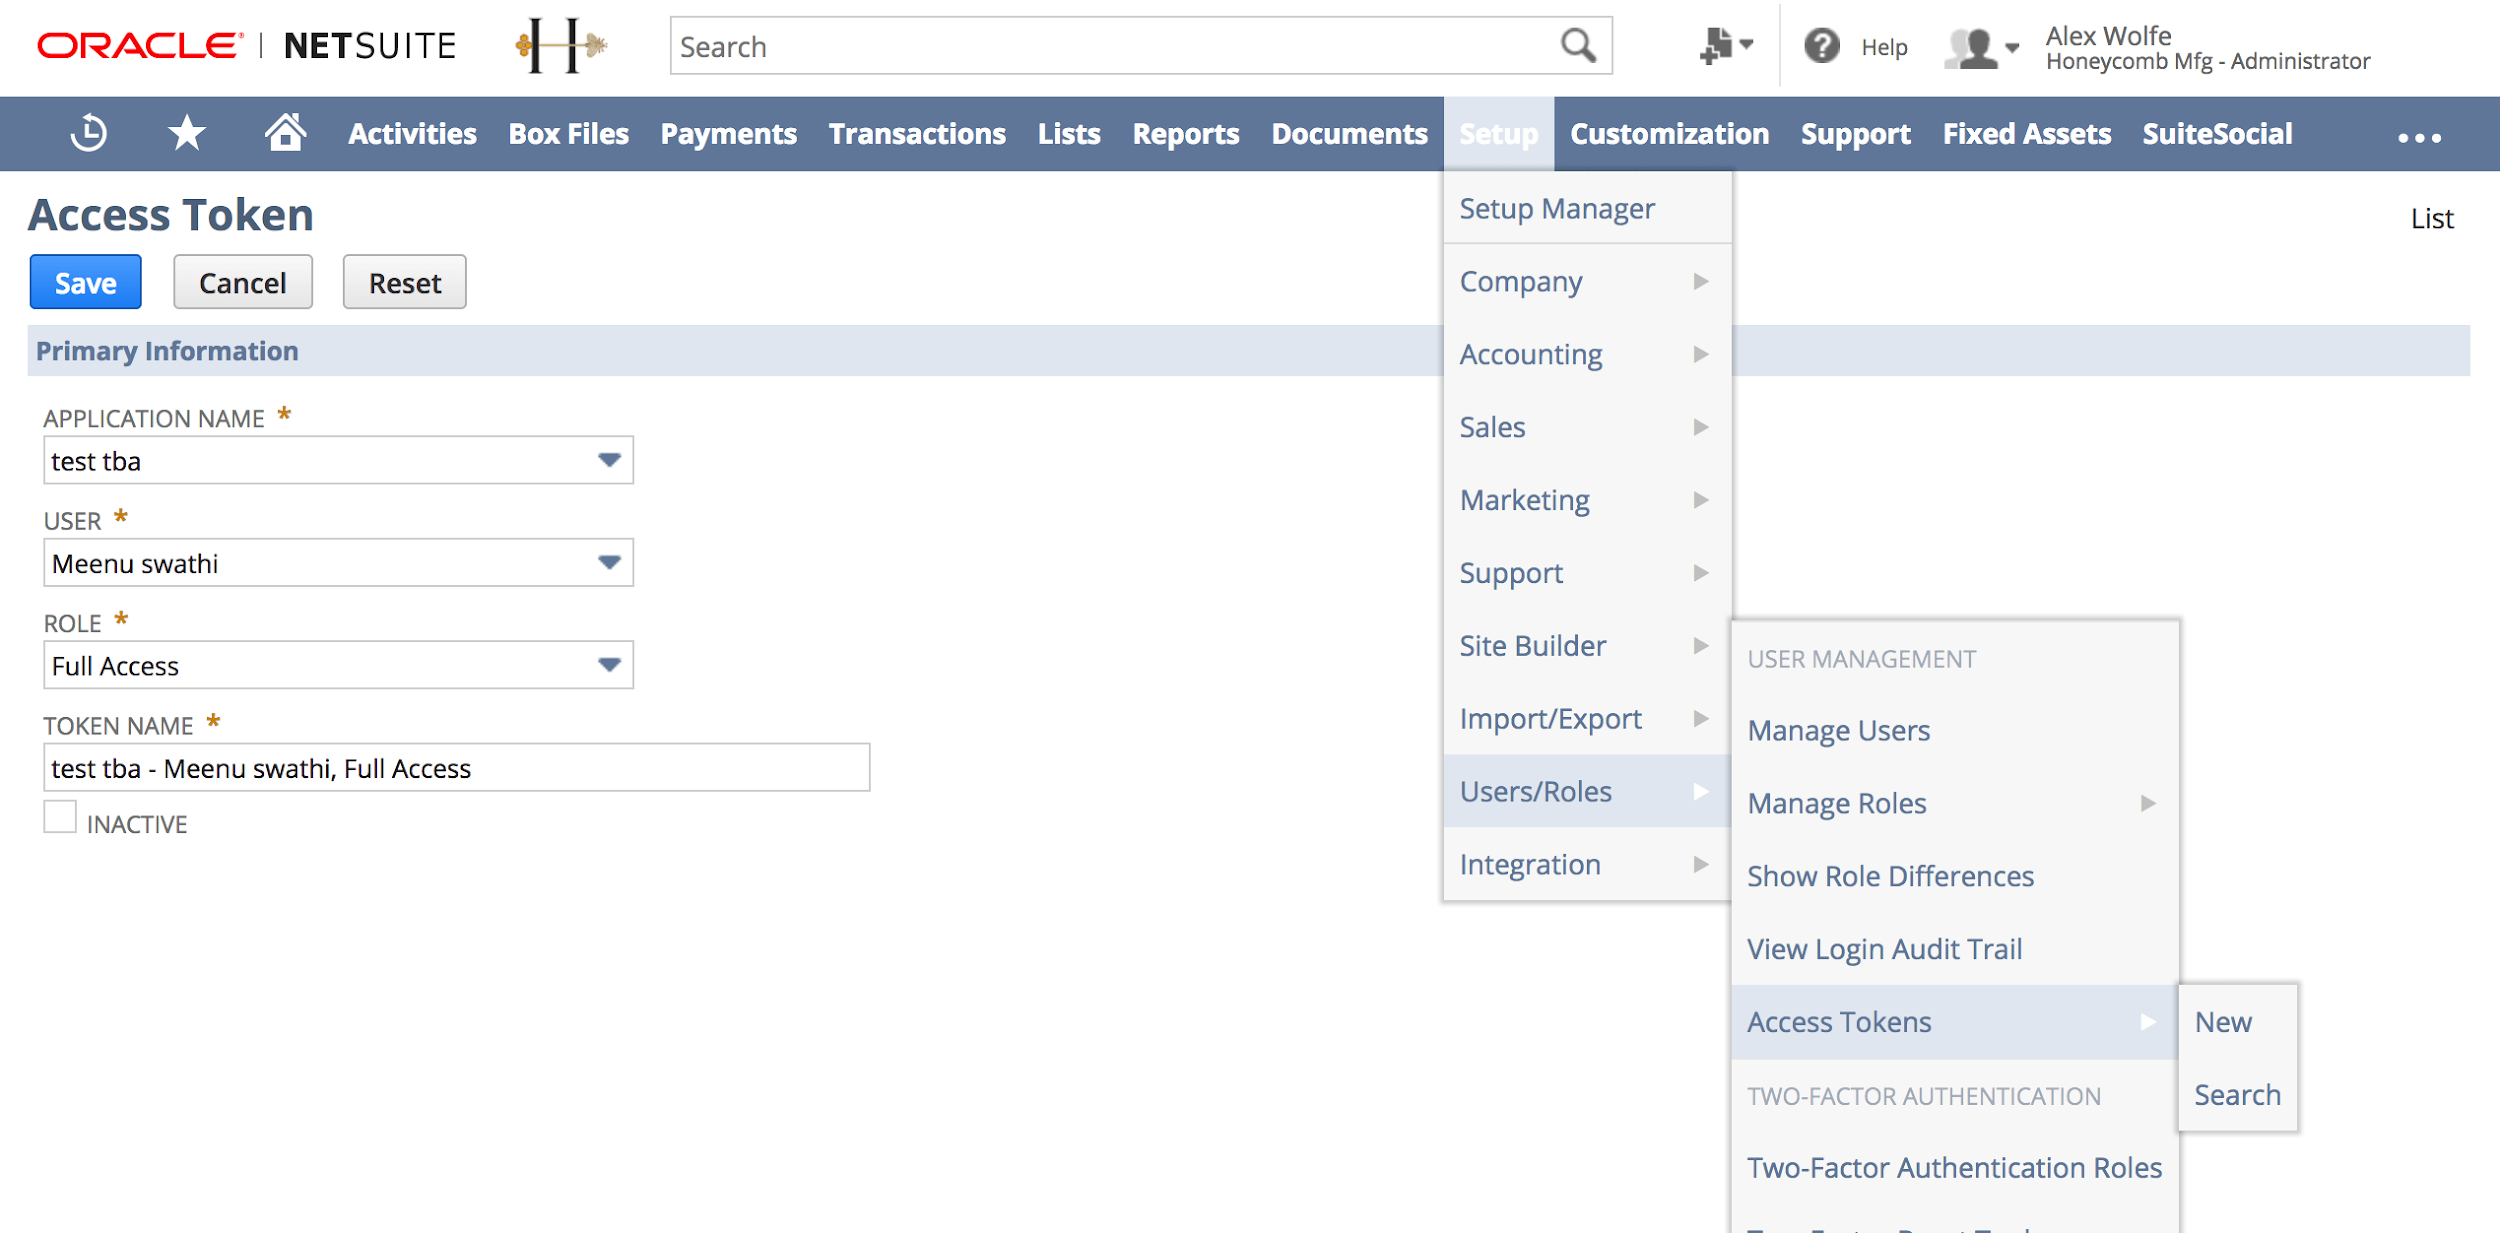
- Select the integration record, integration user and role we created earlier.
- Save the newly created access token.
- Save the token ID and token secret somewhere and keep it confidential - these will not be retrievable again from NetSuite. You’ll enter token ID and token secret into LeanIX SMP to connect NetSuite later.
Configure NetSuite integration in LeanIX SMP
- Log into LeanIX SMP and navigate to NetSuite settings (https://us-si.leanix.net/#/service/NetSuite/settings/ or https://eu-si.leanix.net/#/service/NetSuite/settings/)
- Click on the Integrate button and fill out the form with appropriate credentials:
- Account ID,
- Consumer Key,
- Consumer Secret,
- Token ID
- Token secret.
- Click Integrate
Updated 7 days ago