
User Management
User Roles
- User: provides read access to data in all departments. Users with this access are able to do manage integrations, but can’t modify any other data in the LeanIX SMP. Typically would assign someone like a Finance Administrator who only needs to have read-only access to services data.
- App Catalog User: provides read-only access to (only) the App Catalog. The user is unable to navigate anywhere else within LeanIX SMP (e.g. Dashboard, Discover, etc.) Typically such access would be given to every employee in the organization. This gives every employee the opportunity to view what services an organization has available and be able to request them. No sensitive data is exposed.
- Department User: provides read-only access to data for only one department specified by the Admin. For example, a person responsible for tools in the marketing department will only be able to see details about tools in that specific department. Data from other departments cannot be accessed.
- Department Admin: provides write access to data within a specific department. Access to other departments is not provided. Users are able to modify data only within this department.
- Admin: Full control that allows all operations (create, read, update, delete). Admins are also able to adjust settings on the workspace, add/remove users, etc.
Adding Users
- Go to the Settings by clicking on the icon in the top right corner
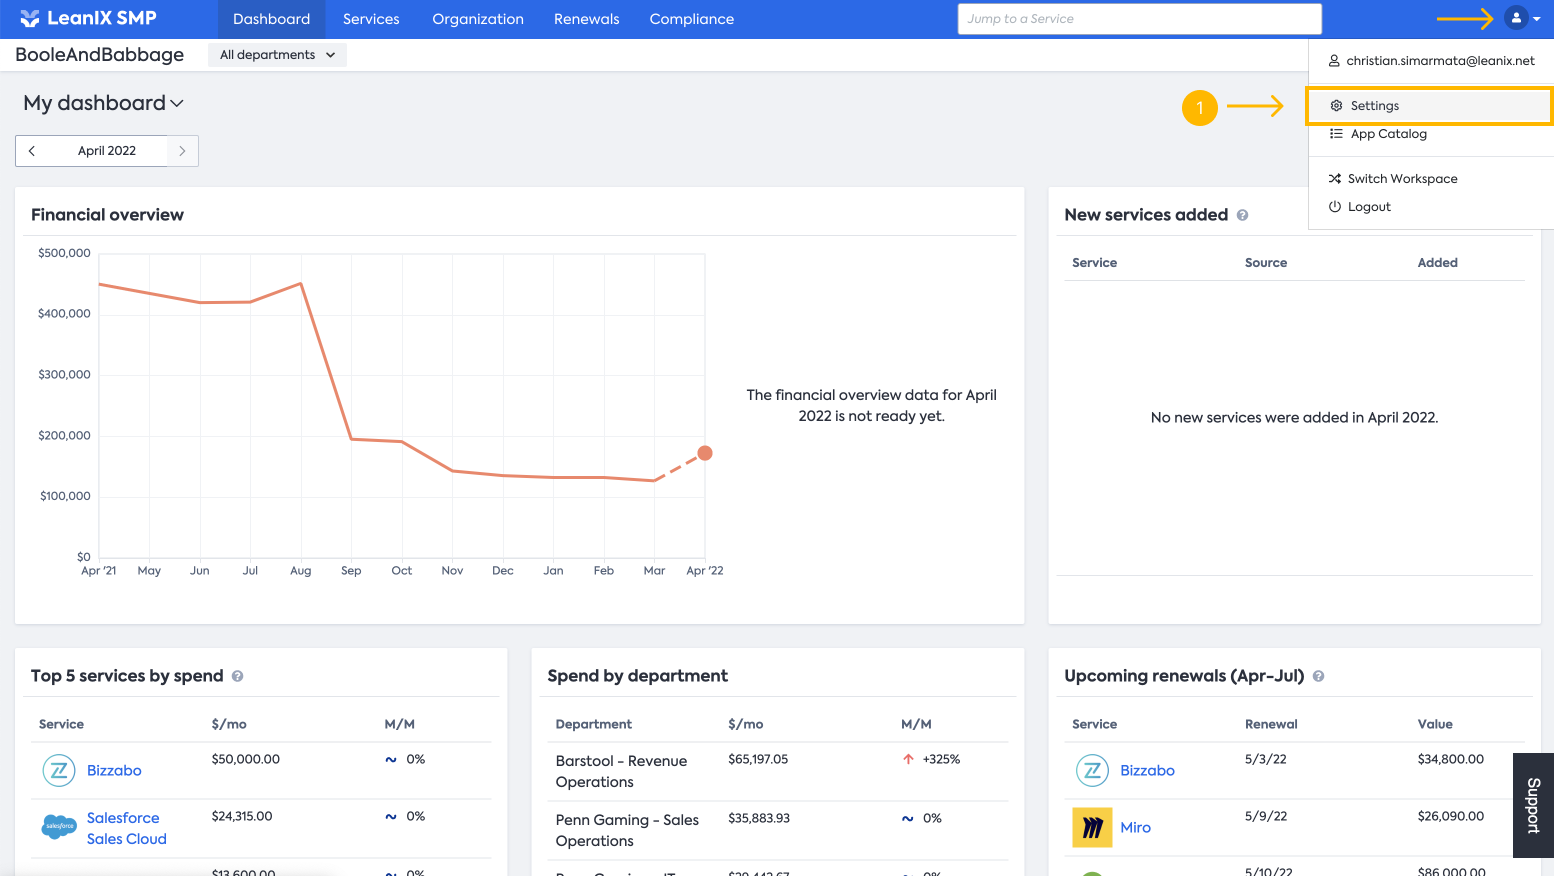
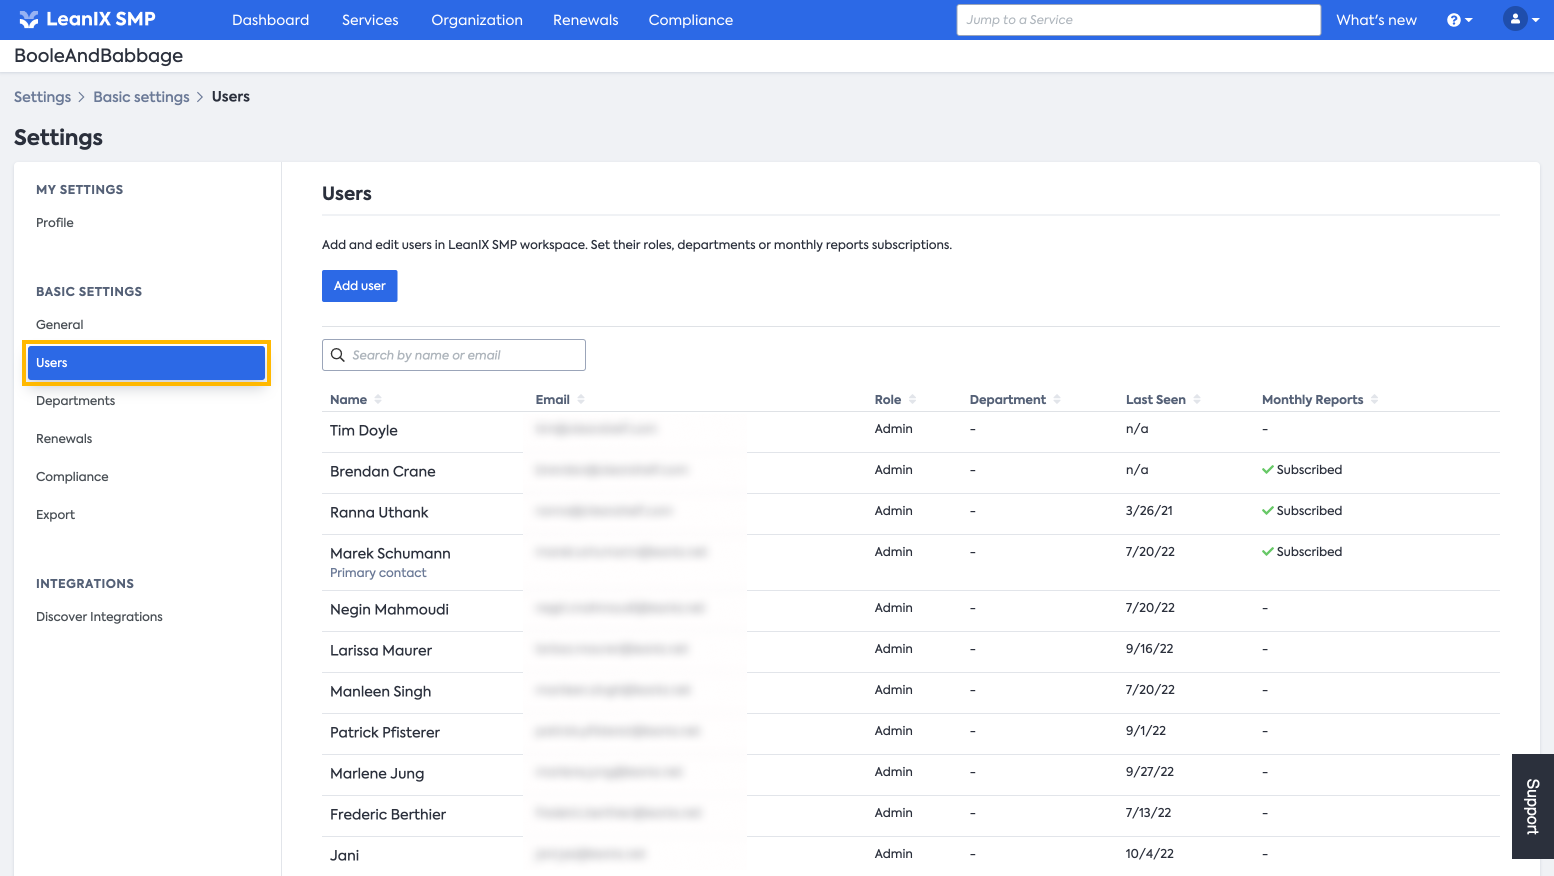
- Click on the Users on the right panel
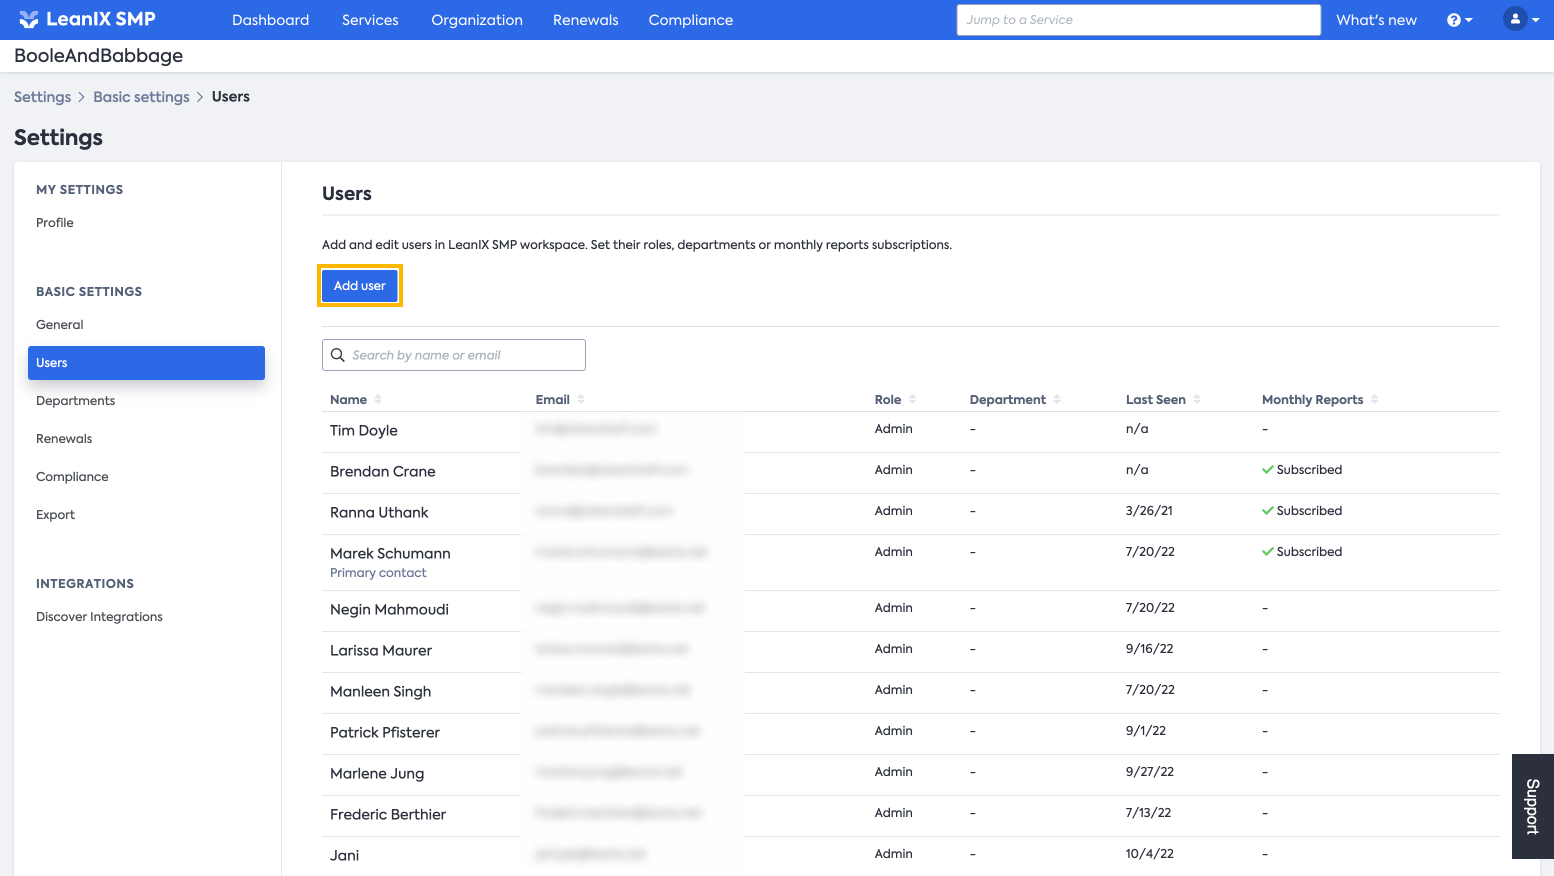
- Click on the Add user button
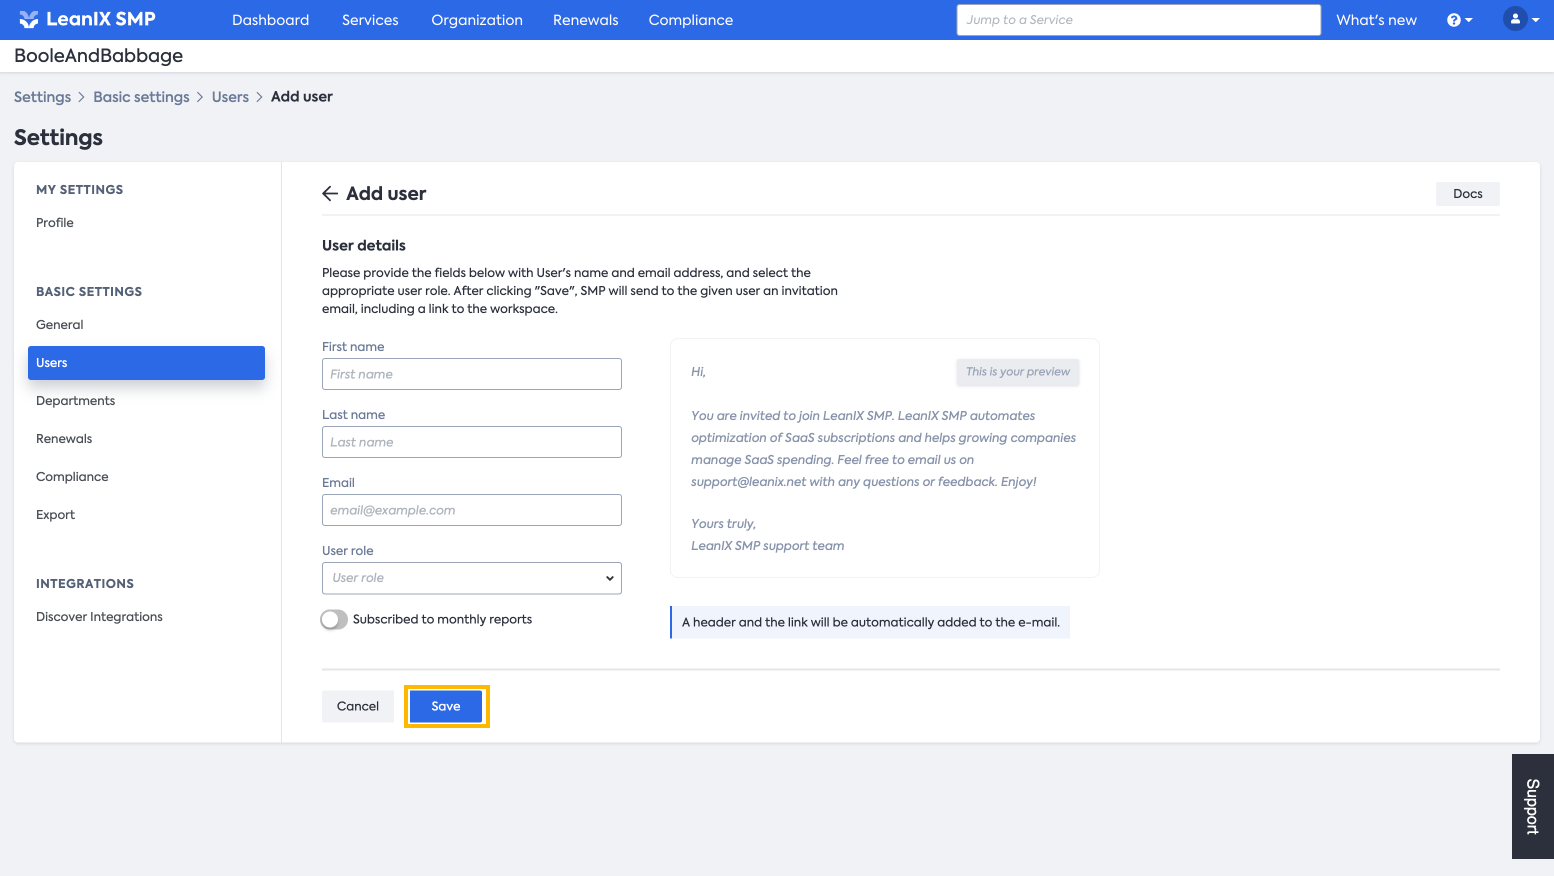
- Fill in the information of the new user and then click Save
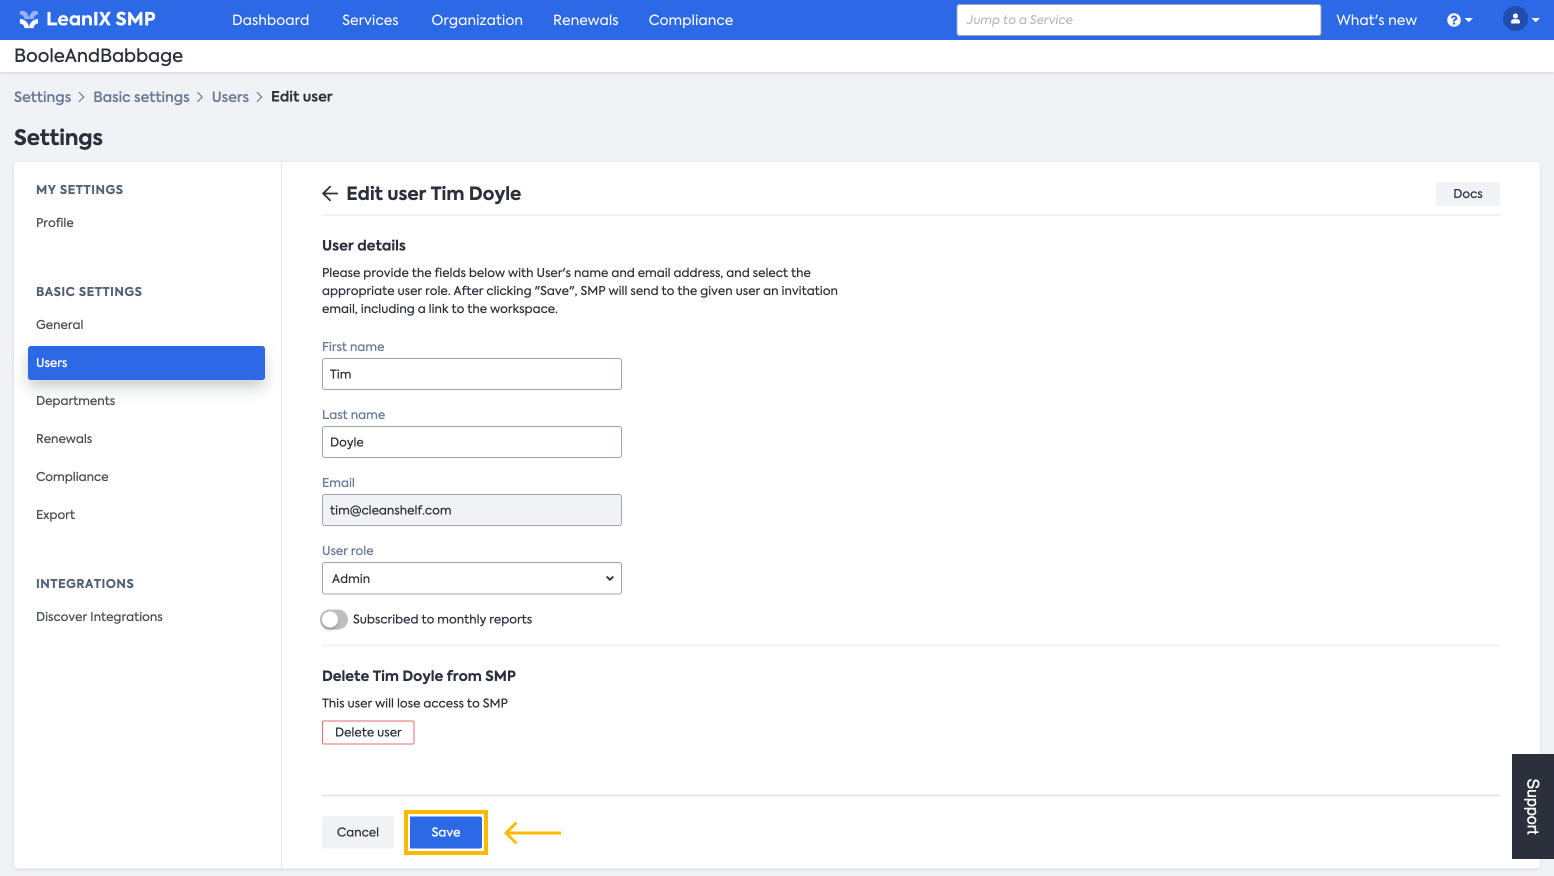
Updating Users
- From the same Users page, choose the user you want to edit, and click on the Edit button to the right of the user info
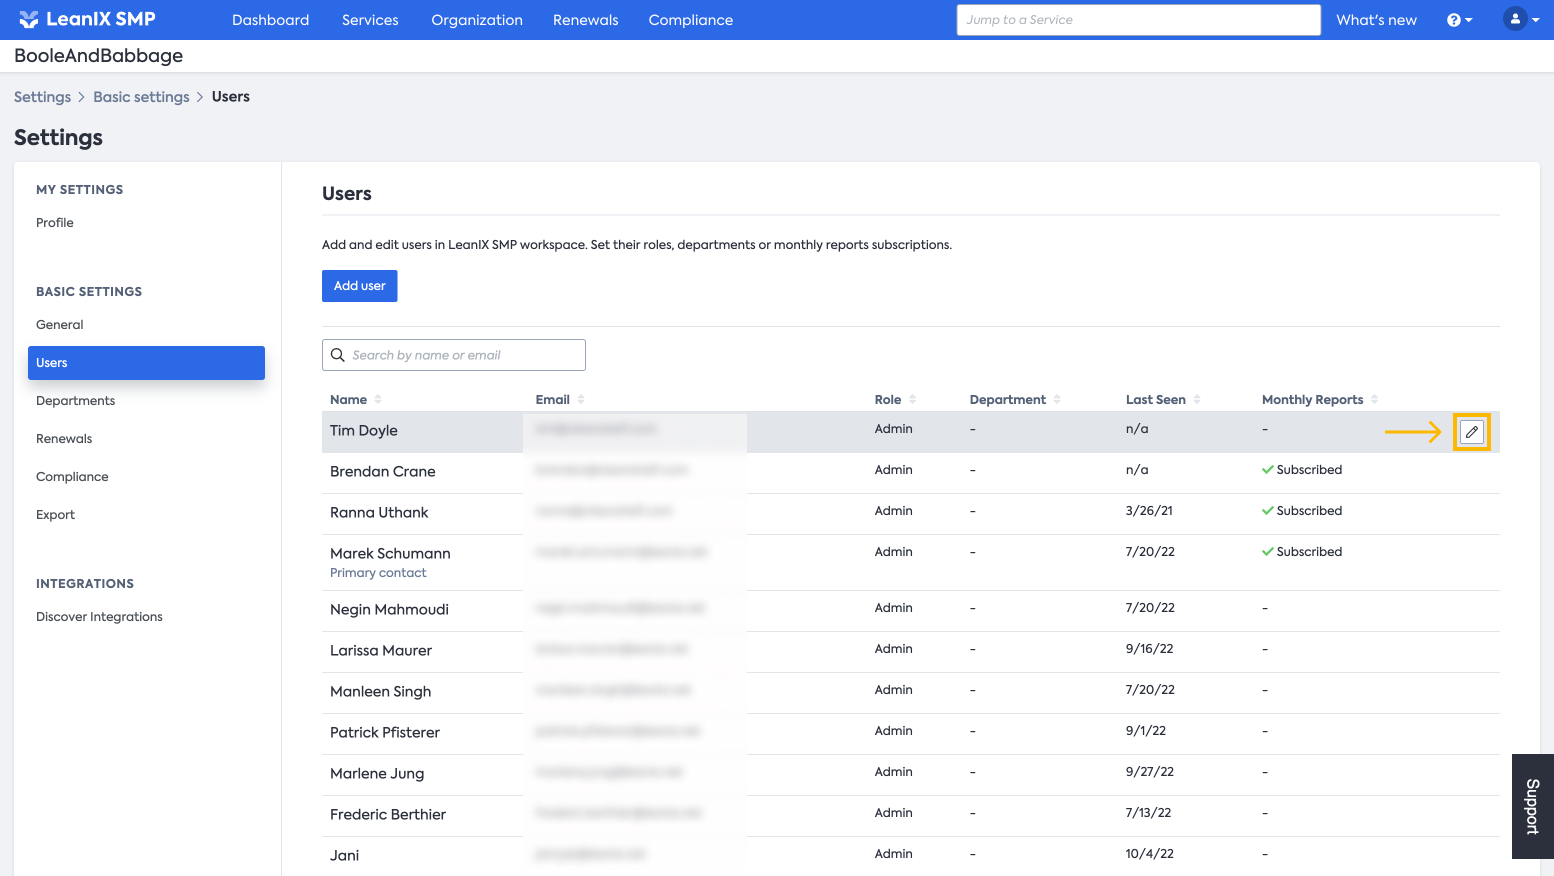
- Make the changes, and click Save
Information
You can update user information at any time, and the changes will be effective immediately.
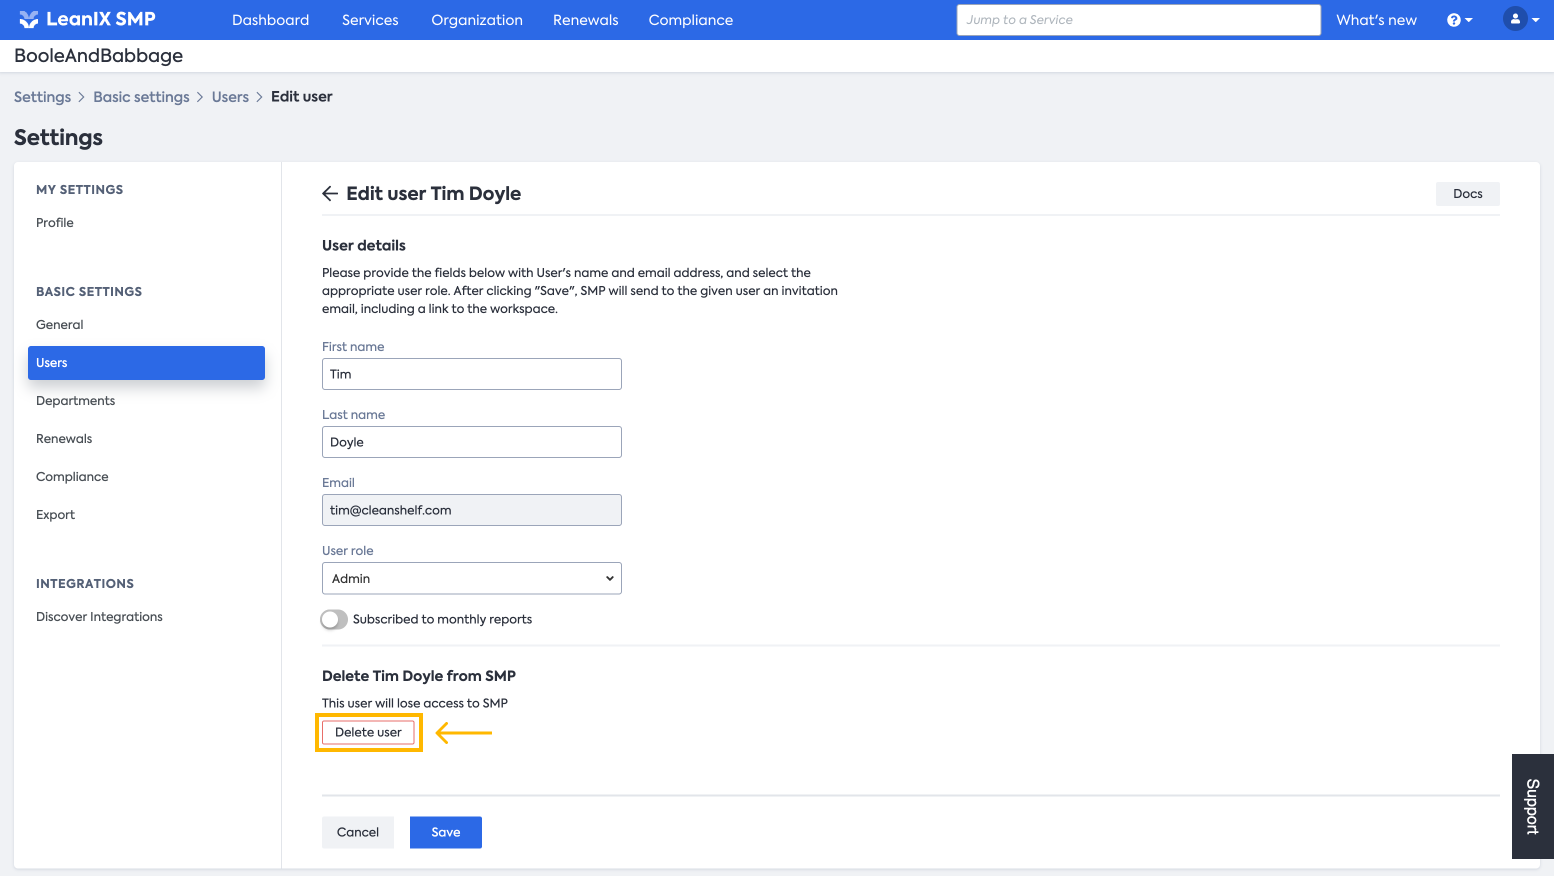
Removing Users
Similar to the previous step, from the same panel, you can Delete Users from the LeanIX SMP.
-
On the Users tab, find the user you want to remove and then click on the Edit button next to the user name
-
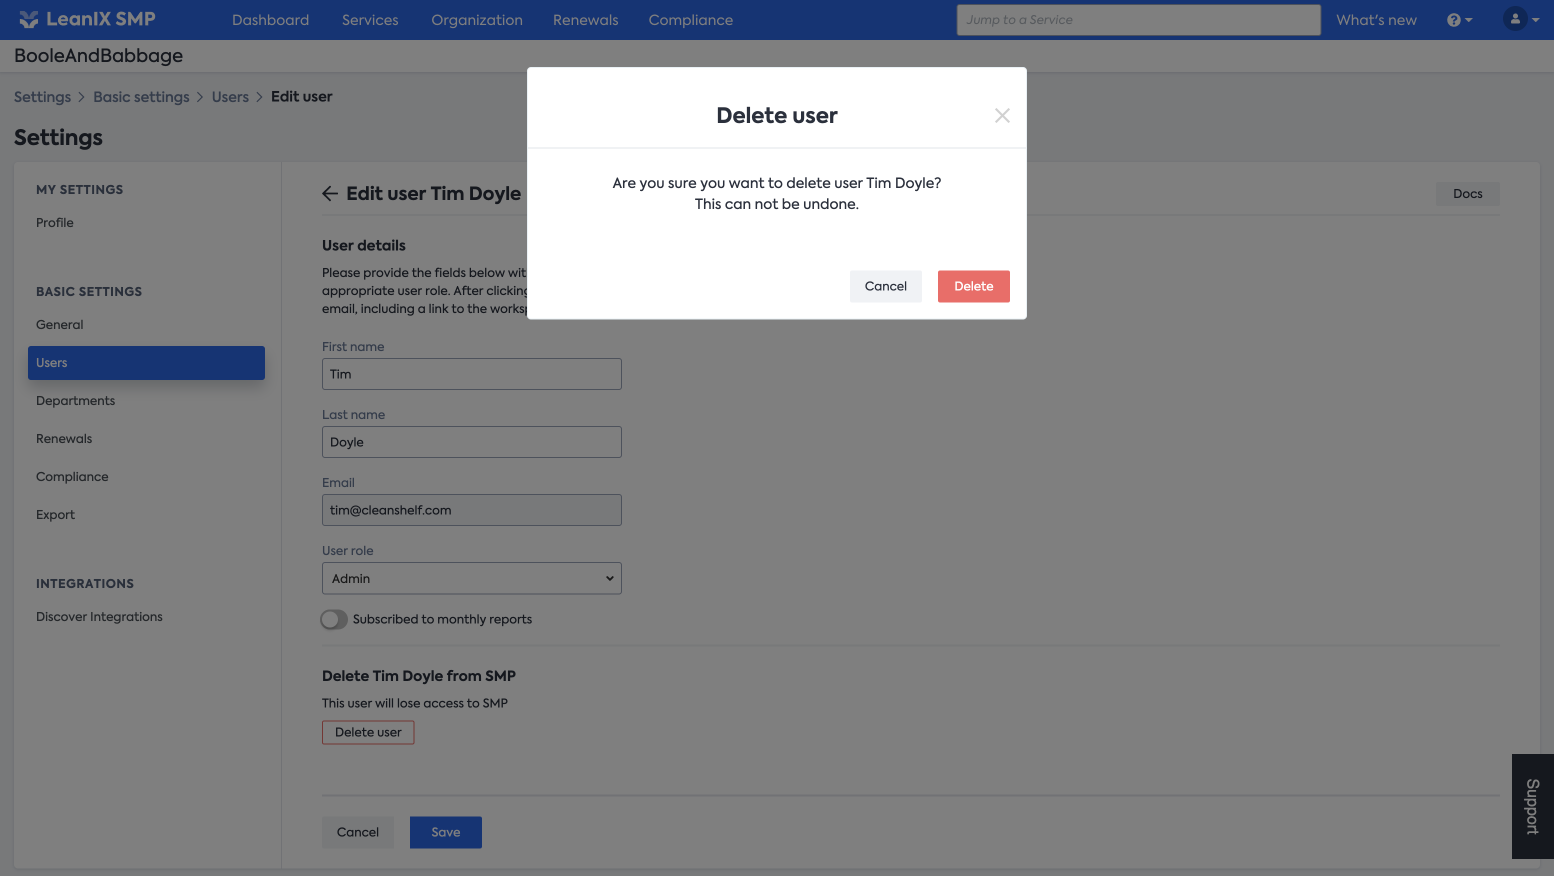
Click on the Delete button
- You will get a confirmation window to proceed with the deletion, then click Delete
Updated almost 2 years ago