SSO with Azure AD SAML
Azure AD SAML Integration with LeanIX SMP
Information
This documentation is deprecated. Refer to it only if your Authentication & Authorization is still configured via the legacy SMP interface. Please refer to Authentication & Authorization for the latest documentation on Authentication & Authorization.
Create a new Enterprise Application in AzureAD
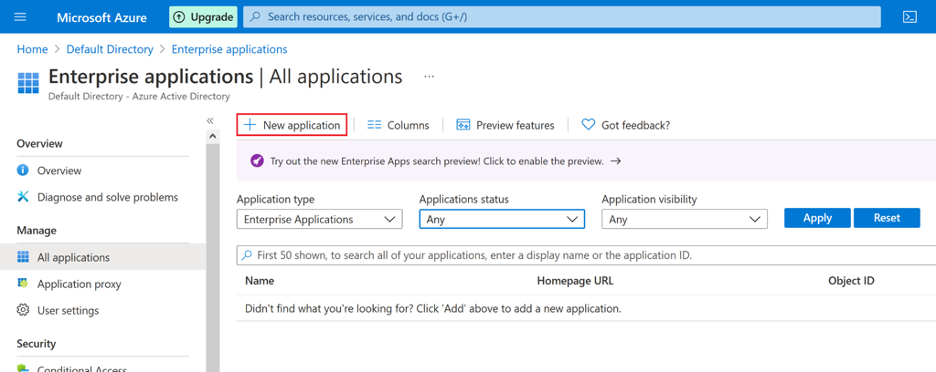
- Login to your Microsoft Azure Active Directory and go to Enterprise Applications, click New Application
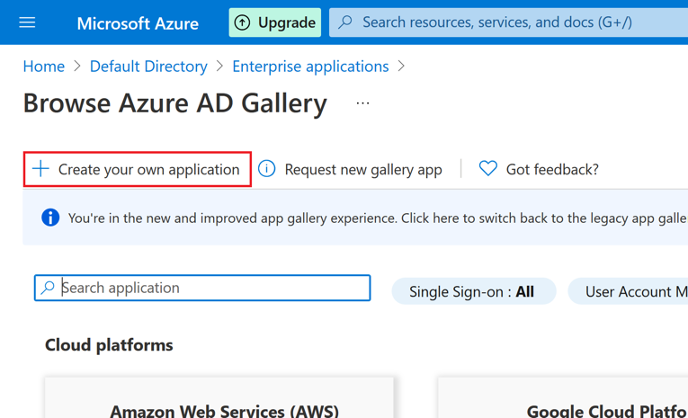
- Select Create your own application
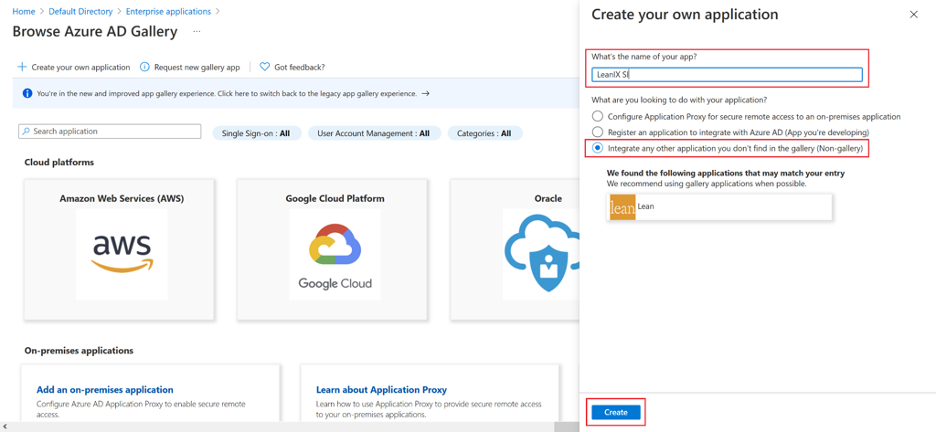
- Enter LeanIX SMP to name field and select Integrate any other application you don’t find in the gallery and then click Create
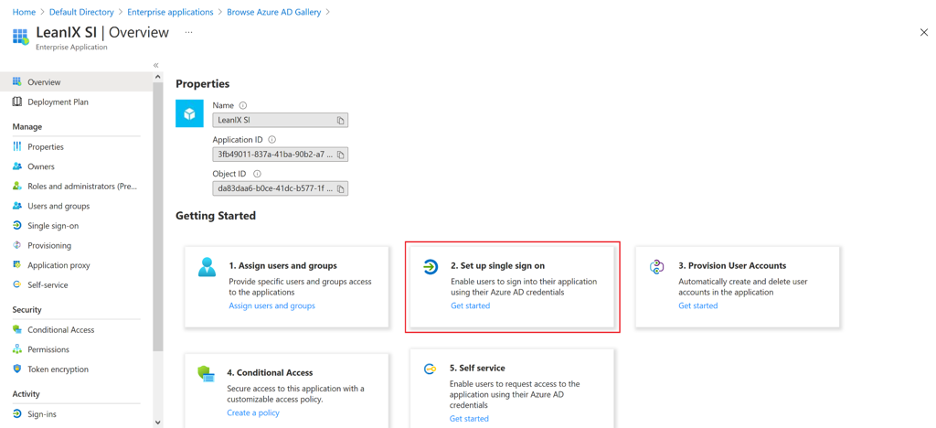
- When LeanIX SMP enterprise application is added select 2. Set up single sign on.
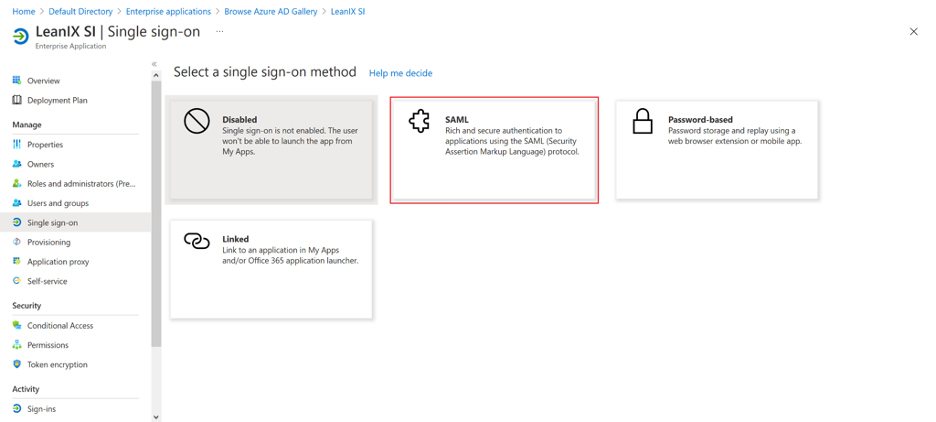
- Then select SAML single sign-on method
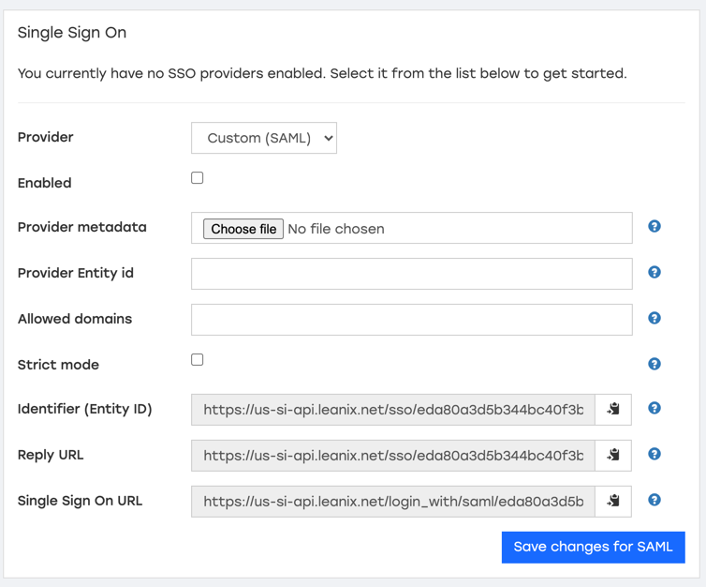
- For Set up Single Sign-On with SAML step you will need data from LeanIX SMP settings. Select Custom (SAML) option for Single Sign On.
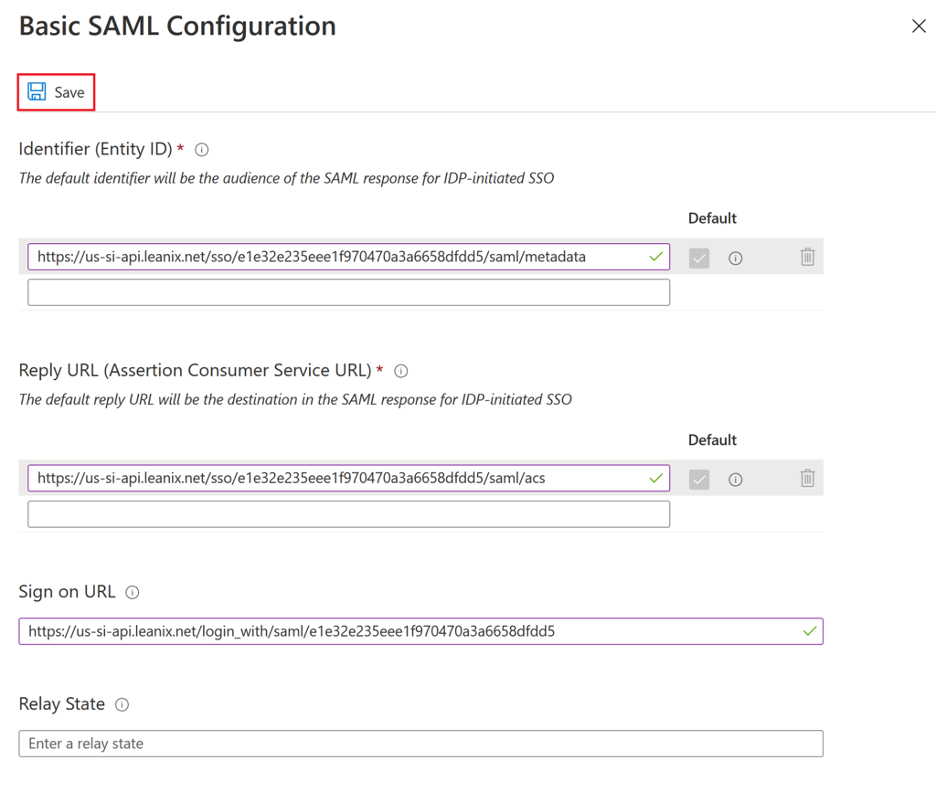
In Azure AD select Edit under Basic SAML Configuration:
● Copy Identifier (Entity ID) value from LeanIX SMP and paste it in Azure AD field Identifier (Entity ID) _field and set it as _Default.
● Copy Reply URL value from LeanIX SMP and paste it in Azure AD field Reply URL (Assertion Consumer Service URL) and set it as Default.
● Copy Single Sign On URL value from LeanIX SMP and paste it under Sign on URL.
Click Save.
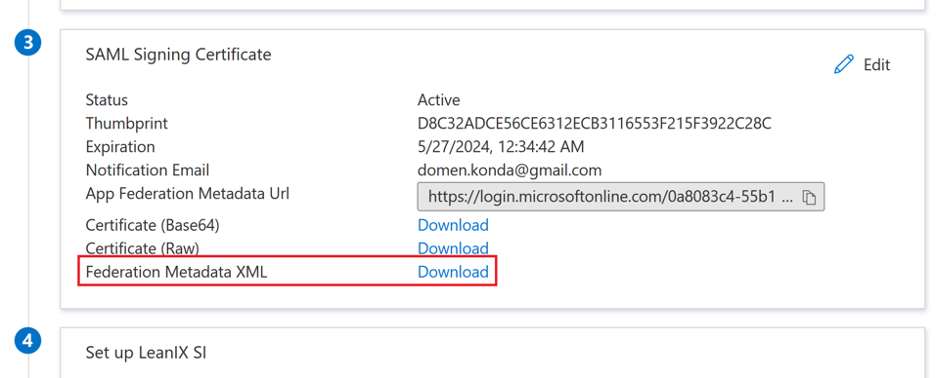
- Under SAML Signing Certificate download the Federation Metadata XML as you will need to upload this file into LeanIX SMP.
Setup LeanIX SMP AzureAD SAML SSO
- In Account settings SSO settings in LeanIX SMP, select Custom (SAML) and upload the file you downloaded before from Azure AD, under Provider metadata.
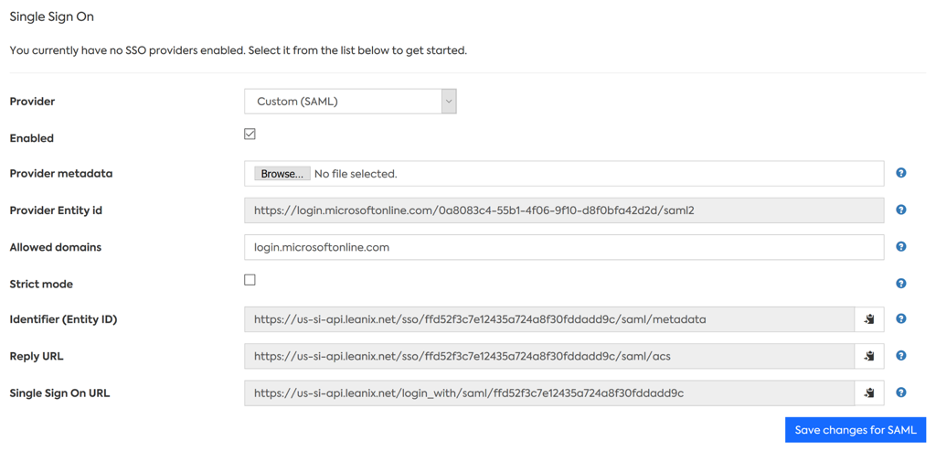
- Set Allowed domains (e.g. your-company.com or login.microsoftonline.com) from which are users allowed to sign in.
- Last, click on Enabled checkbox and Save changes for SAML button and
- You should be able to sign in to LeanIX SMP using AzureAD. In case of misconfiguration please use username/password to sign into LeanIX SMP to modify your configuration.
Updated almost 2 years ago
