
Microsoft Entra ID
Microsoft Entra ID is Microsoft’s cloud-based identity and access management service, which helps your employees sign in and access resources in:
- External resources, such as Microsoft 365, the Azure portal, and thousands of other SaaS applications.
- Internal resources, such as apps on your corporate network and intranet, along with any cloud apps developed by your own organization.
Microsoft Entra ID is a valuable source for discovery as it provides not only the ability to discover services and users but also can be leveraged to discover employee and department data.
Integration details
Integration Categories
- Single Sign-on & CASB System
- HRIS
Authentication mechanism
- API
Discovery Capabilities
| Available entities | Product | Entity description | Entra ID resource | Minimal permissions required |
|---|---|---|---|---|
| New services | EAM, SMP | Service discovery is the process of automatically identifying services and applications. All discovered services are shown in the LeanIX workspace automatically. | servicePrincipal | Application.Read.All |
| Users | SMP | Users represent all discovered people who use a specific SaaS. | auditLogs (signIns) | AuditLog.Read.All |
| Employees | SMP | Employees are discovered to get a complete overview of all employees of an organization and enrich the data for each discovered user. Through this we can show the total number of assigned users per service and show the respective last sign in dates. | users | Directory.Read.All |
| Departments | SMP | Departments represent the organisational structure of an organization relate to employees. This data is used to identify where in the organization which SaaS is used. | users | Directory.Read.All |
Set up Microsoft Entra ID
Register new application in Microsoft Entra ID
-
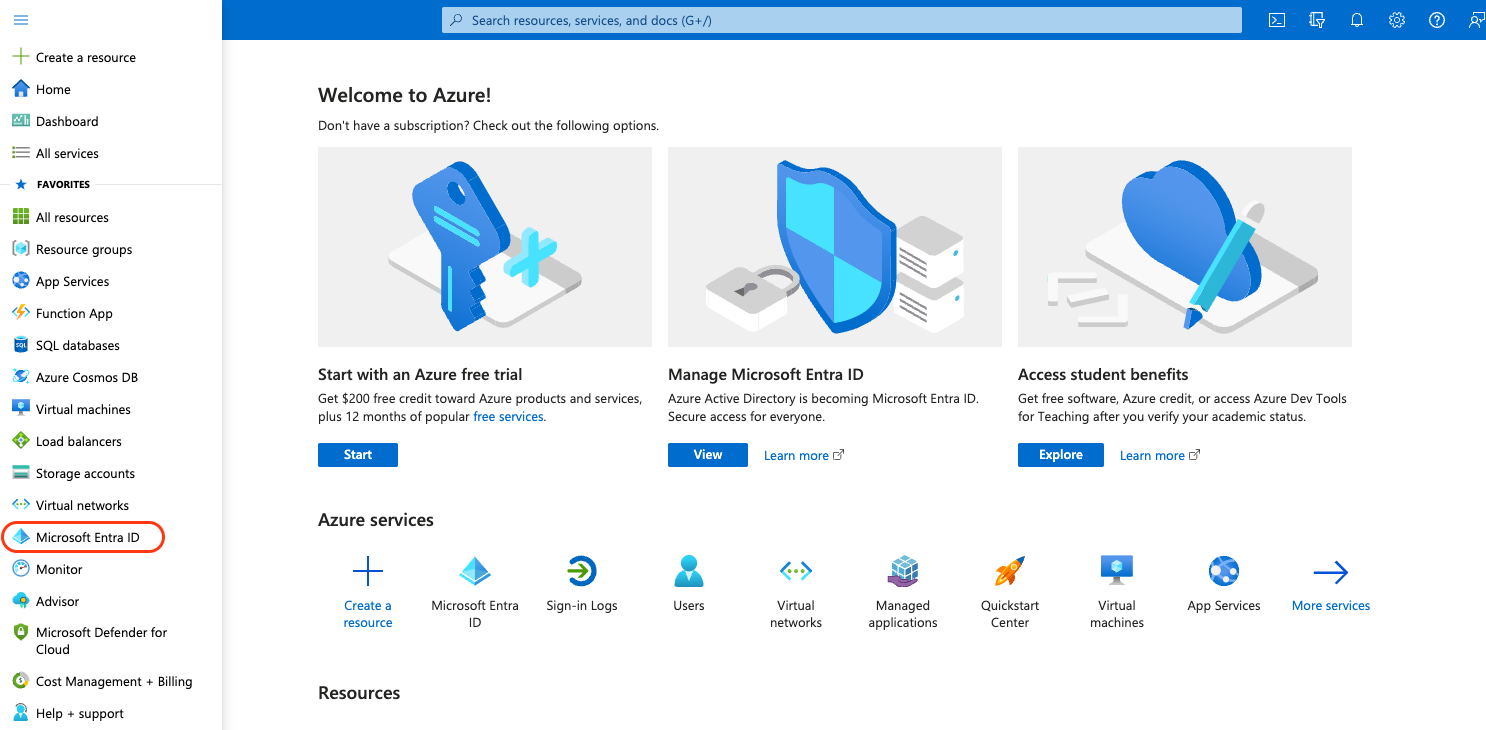
Sign in to the Azure portal (https://portal.azure.com/) with an Azure administrator account that is also a member of the Global Administrator directory role in your Microsoft Entra ID tenant.
-
On the left navigation pane, click Microsoft Entra ID.
-
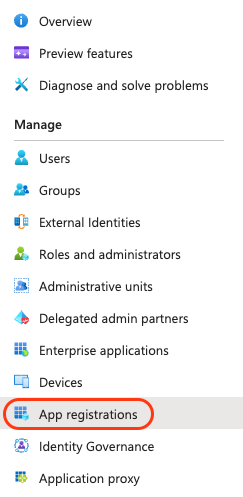
On the Microsoft Entra ID page, click App registrations.
-
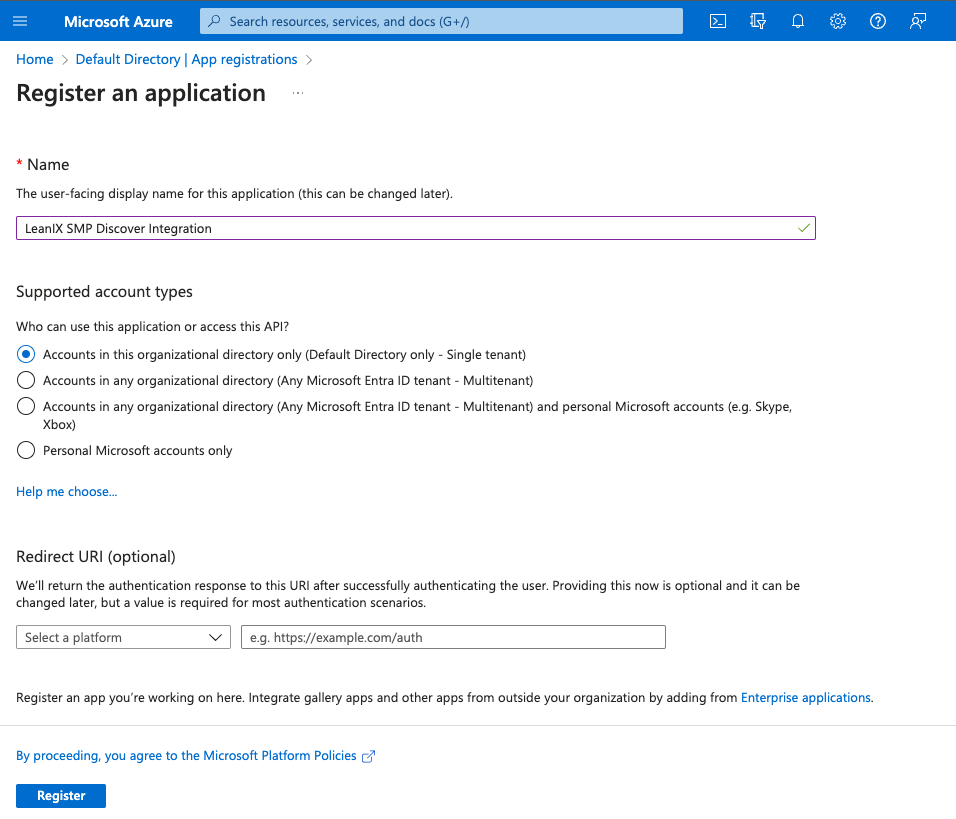
On the App registrations page, in the toolbar on the top, click New registration.

-
On the Register an application page, perform the following steps:
5. In the Name textbox, typeLeanIX SMP Discover Integration(it is just a label so it can be anything that will make you identify it relates to LeanIX integration).
6. Under Supported account types selectAccounts in this organizational directory only (Default Directory only - Single tenant)
-
Click Register at the bottom of the screen.
Grant permissions
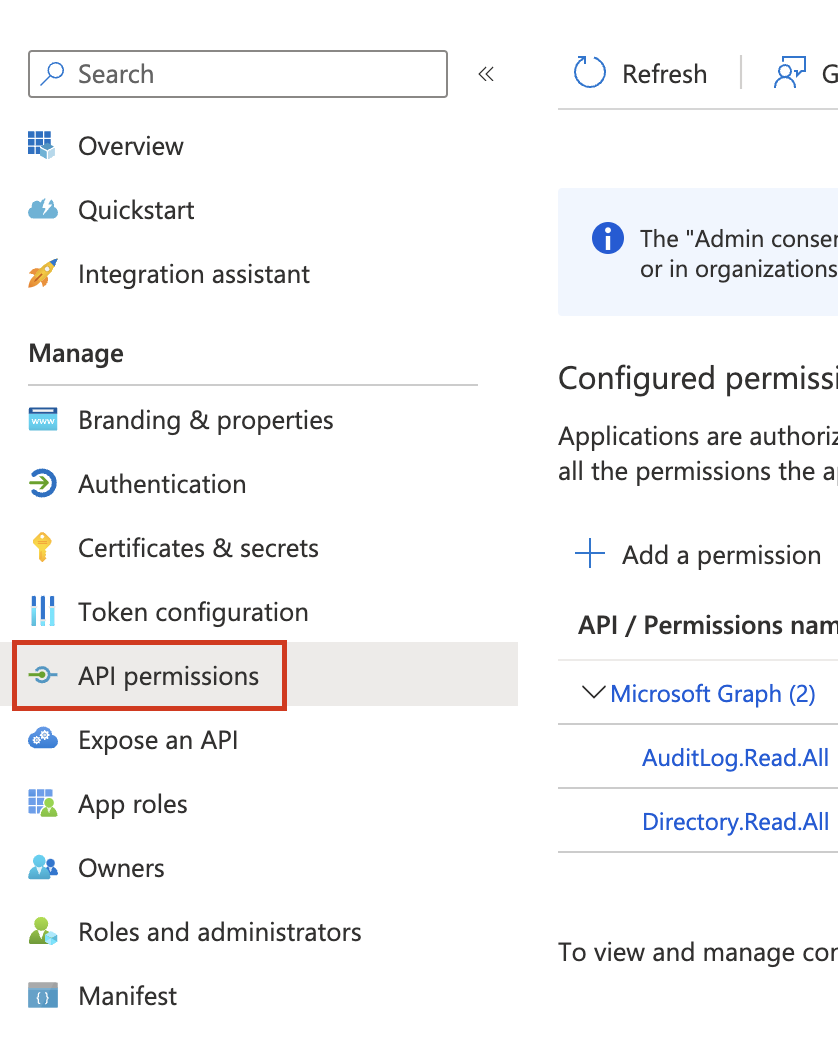
- Next, we will configure the API permissions for the application.
- Click on API permissions to define a list of permissions for the application.
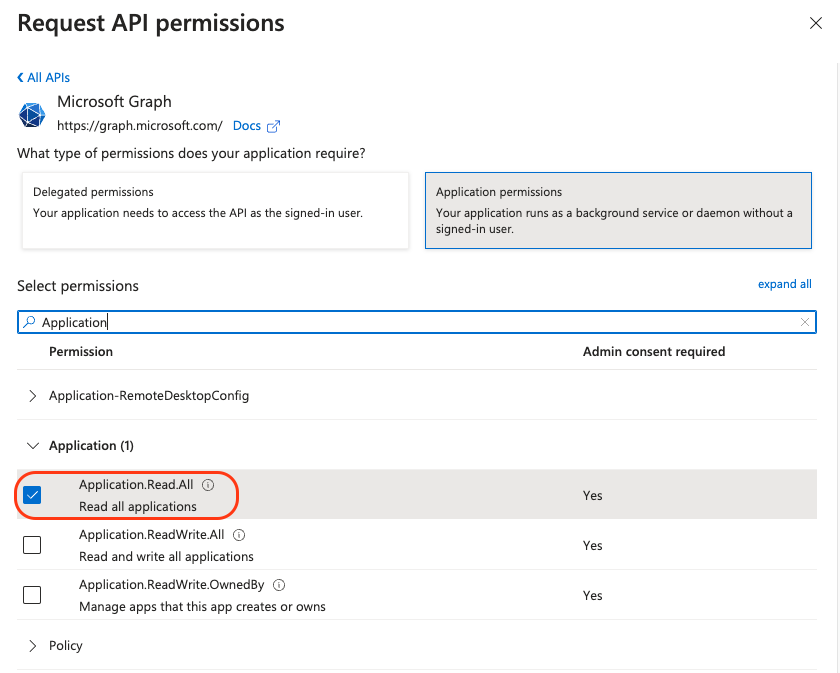
- On the API permissions page click Add a permission button.

- New configuration panel Request API permissions will display on the right, and select the Microsoft Graph API.

- Next, select the Application permissions option
- According to the capabilities selected in LeanIX product, please make sure to add relevant permissions as listed in Discovery Capabilities table. For example, for new services make sure you select Application.Read.All.
Why is Directory.Read.All permission required in some cases?
There is a known issue on the Microsoft Graph API that is used to obtain access logs.
More details can be found at https://developer.microsoft.com/en-us/graph/known-issues/?search=13673
- Click on the Add permissions button at the bottom to assign permission to the LeanIX application.
- Click on the Grant admin consent for Default Directory button to enable configured permissions for the application.

- Next, click Yes to grant consent for the requested permissions.

- The permission status indicator in the API permissions page will change to approved.

Gather configuration settings
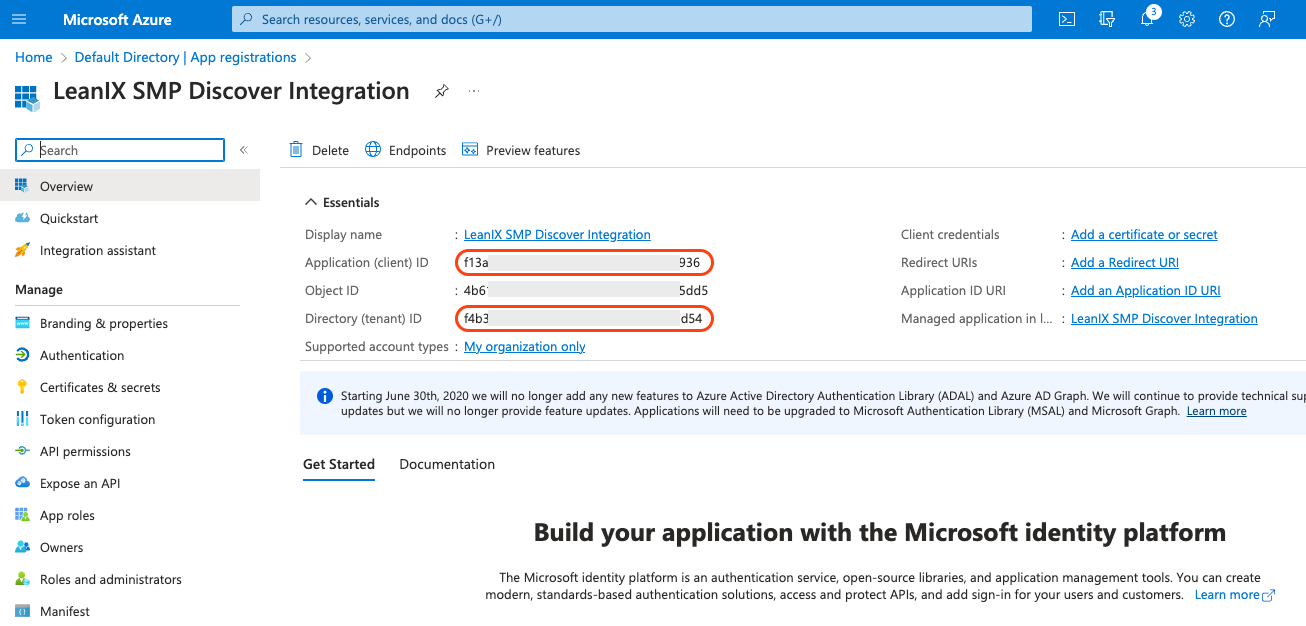
- Return back to the application overview section (App Registrations -> click on created app) from where you will need to grab the following identifiers: Application (client) ID and Directory (tenant) ID
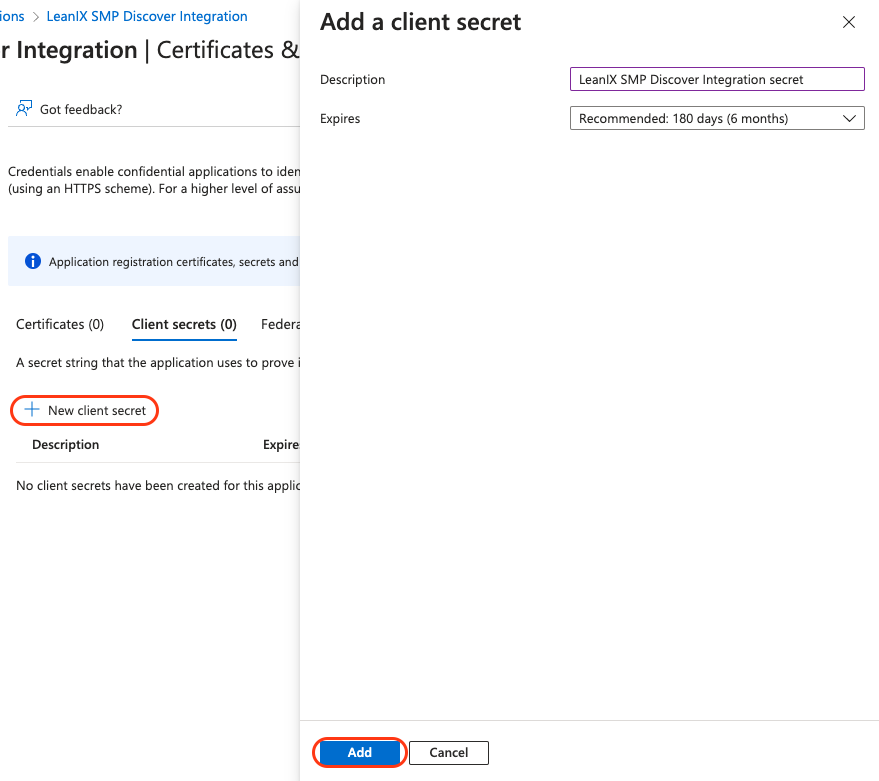
- Navigate to Certificates & secrets to generate a client secret, also referred to as the application password.
- Click on New client secret button to create a new password.
- Please choose the description for the secret (e.g.
LeanIX SMP Discover Integration secret) or leave it empty - Select the expiration length of the secret. Once the expiration date of the created client secret will be reached, you will have to create a new one and reconfigure the integration in LeanIX application.
- Click Add
- Please choose the description for the secret (e.g.
- Copy the Secret Value to your clipboard.
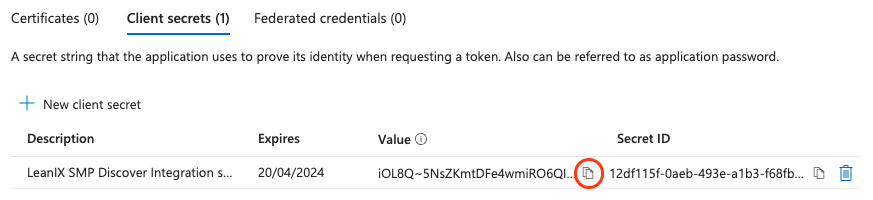
Please make a note of the client secret value as soon as it is revealed. It will be masked when you navigate away from the Certificates & secrets panel.
This value needs to be added to LeanIX under Client Secret.
Integrate Microsoft Entra ID in LeanIX
- Log in to LeanIX.
- In LeanIX EAM: Navigate to Administration > SaaS Discovery > Integrations find Microsoft Entra ID and click Add integration
In LeanIX SMP navigate to Account Settings > Discover Integrations > Add Integration, find Microsoft Entra ID and click Connect
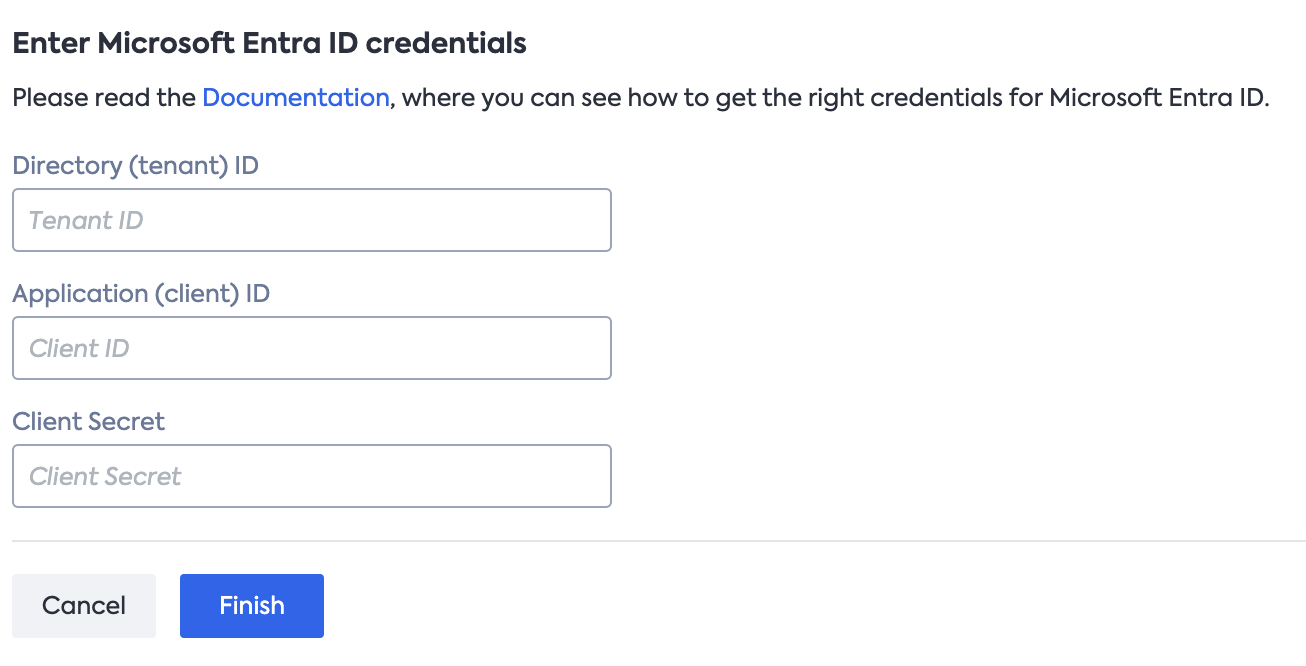
- Enter Directory (tenant) ID, Application (client) ID, and Client Secret
- Click Finish
Updated 9 months ago