
Step 3. Enrich Data
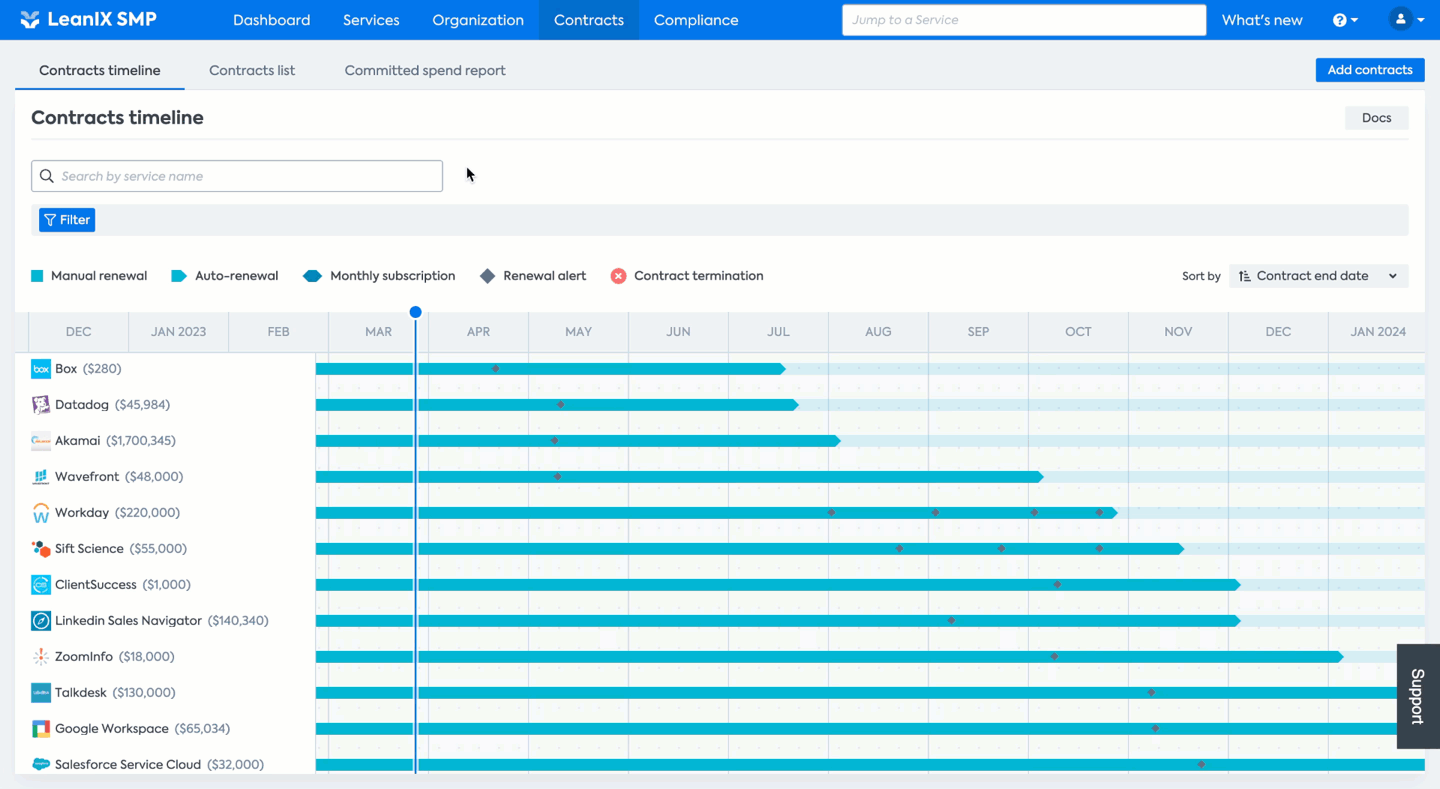
After the initial upload of contract data, you will have a good baseline of existing contracts. Now it is time to enrich this data, after having successfully assigned business owners to each service. The goal of this step is to have a closer look at these contracts and, for instance, add missing pieces such as PDFs or annexes. For better management of your SaaS portfolio, it's a good idea to add more information to enrich the data. This will help you get a clearer picture of your SaaS applications and manage them more efficiently. For this step, you have a variety of options in the Contracts List which you can explore in detail in this documentation.
For example, say you need to Split contract value. Splitting the Contract value allow SMP to assign a contract value for a specific time period. Let's say you have a 3 years contracts and you get a discount on the first year , and the 2nd and 3rd year have a increasing value of 5% each. Having this documented in SMP will enable a more precise committed spend report that will help you to plan your budget along the years.
Let’s say we would like document this for the service Akamai. To do so, from the Contracts page,
- Click on the Contracts list
- In the Contracts list section, find the service Akamai and click on the ‘Kebab menu’ icon, which appears when you hover over the service
- From the menu, select Edit Contract, which will lead you to the page where you can make all necessary changes to a contract, including splitting the Contract Value
- After the necessary changes, hit Save to update the values
LeanIX SMP provides the flexibility to edit contracts in other ways too. You can access the contract associated with a particular service by simply selecting the service and clicking on the Contracts from the left-hand pane.
For instance, you may need to add an annex to Akamai’s contract. To do so, from the Services page,
- Find and click on the Akamai service
- Click on Contracts from the left-hand pane
- Select the contract to which the annex has to be added
- Click the Add annex button in the top right corner and at the bottom of the page to input the necessary data, and click Save
Step-by-step guide
Updated about 1 year ago