
Workday
Workday offers enterprise-level software solutions for human resource and financial management.
Pricing Workday pricing is not public.
Integration Information
Data Collected
Connection details
- Status: Early Access
- Type: api
Instructions
In this document, we will provide instructions for connecting Workday with LeanIX SMP to get accounts data.
1 Configure a System Integration User in Workday
To create an integration system user:
- Sign into your Workday tenant using an administrator account.
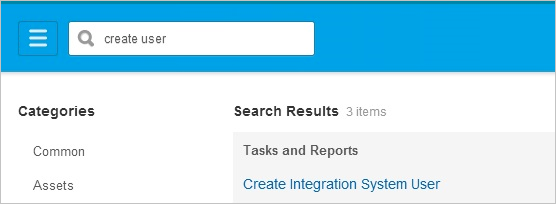
- Search for and open the Create Integration System User task.
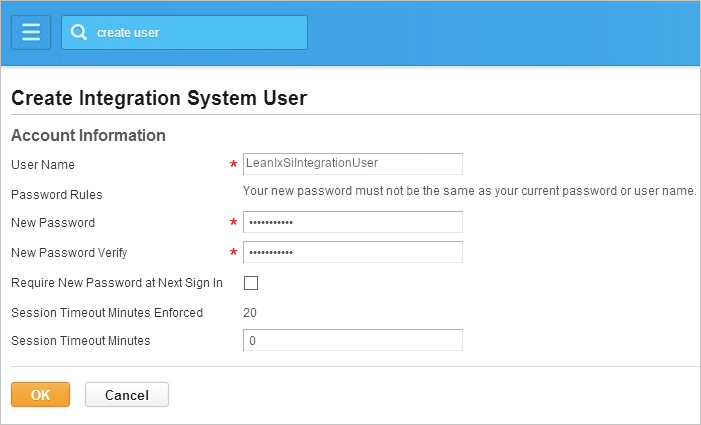
- Create Integration System User by supplying a User Name (LeanIXSMPIntegrationUser) and Password for a new Integration System User.
- Leave the Require New Password at Next Sign In option unchecked, because this user will be logging on programmatically.
- Leave the Session Timeout Minutes with its default value of 0, which will prevent the user’s sessions from timing out prematurely.
2) Create a Security Group
You need to create an unconstrained integration system security group and assign the user to it. To create a security group:
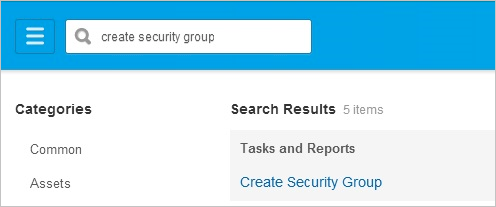
- Search for and open the Create Security Group task.
- In the Type of Tenanted Security Group field, choose Integration System Security Group (Unconstrained).
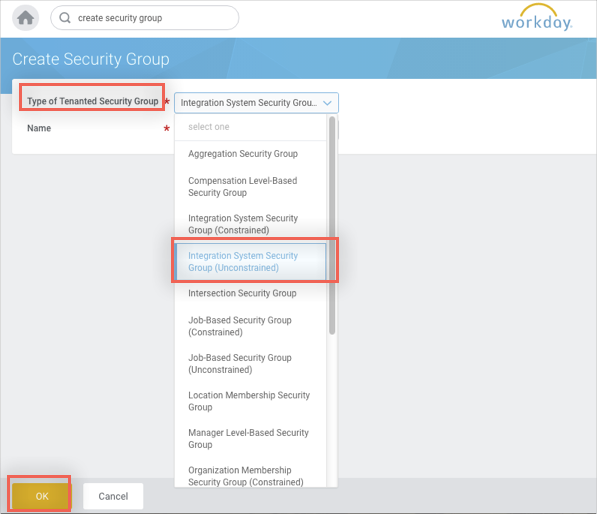
- Enter a group name “LeanIXSMPIntegrationUser” and click OK.
- Select the user you created (LeanIXSMPIntegrationUser) from the Integration System Users choice list and click OK, and then click Done.
3) Configure security group options
Add the integration security group to domains by completing the following steps:
- Search for domain: manage org and open the Manage: Organization Integration domain.
- Click the ellipsis (...) next to Manage Organization Information. In the window that opens, point to Domain and select Edit Security Policy Permissions.
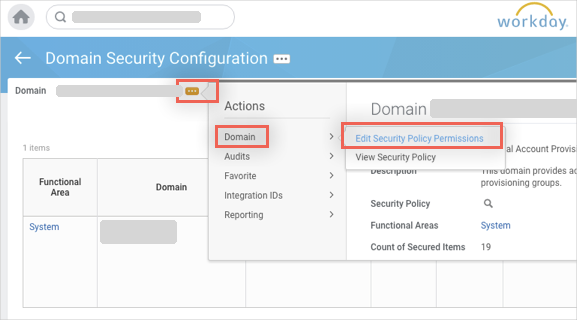
- Under Integration Permissions, add the security group “LeanIXSMPIntegrationUser” (GET and PUT) that you created and click OK.

Next, follow steps 1-3 add the security group under each permission for HR module. Permission names could differ so please adjust access to appropriate resources. See the list below for permissions/resources:
For suppliers and invoices (accounts payable):
| Operation | Domain Security Policy | Domain Security Policies Inheriting Permission |
|---|---|---|
| Get Only | Reports: Supplier | |
| Get Only | Process: Recurring Supplier Invoice | |
| Get Only | Process: Supplier Invoice | Process: Supplier Invoice - Add Attachment Process: Supplier Invoice - Core Process: Supplier Invoice - Hold from Payment Process: Supplier Invoice - Invoice Workbench Process: Supplier Invoice - Mass Action Process: Supplier Invoice - Prepayments Process: Supplier Invoice - Request Process: Supplier Invoice - View |
For HR (employees and departments):
| Operation | Domain Security Policy | Domain Security Policies Inheriting Permission |
|---|---|---|
| Get Only | Worker Data: Public Worker Reports | |
| Get Only | Worker Data: Current Staffing Information | |
| Get Only | Worker Data: Worker ID | |
| Get Only | Worker Data: All Positions | |
| Get Only | Worker Data: Business Title on Worker Profile | |
| Get Only | Personal Data: Work Contact Information | Person Data: Work Address Person Data: Work Email Person Data: Work Instant Messenger Person Data: Work Phone Person Data: Work Web Address |
4) Manage Authentication Policies
- Open the "Manage Authentication Policies" view and select the environment where data should be fetched from (usually called "Production")
- Navigate to the Authentication Ruleset after clicking on "Edit" at the bottom of the page.
- Add a new rule for the previously set up integration user and allow access to the system via Username and Password . We also have the capabilities to use a static IP range for this integration, please reach out to [email protected] if this should be configured for you.
- Once the exception for the SMP integration user is configured, proceed to the next step.

Authentication Policy for the SMP integration user
5) Activate All Pending Security Policy Changes
Activate Pending Security Policy Changes by completing the following steps:
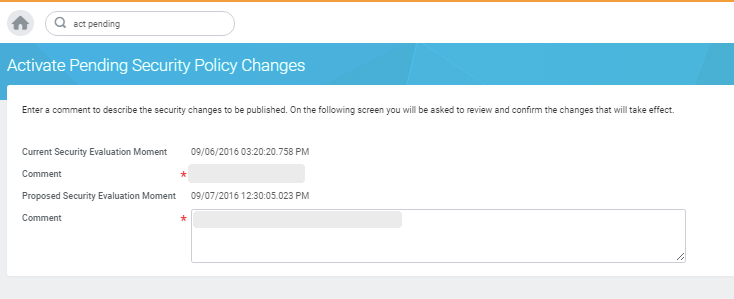
- Search for act pending and then click on the link Activate All Pending Security Policy Changes.
- Begin the Activate Pending Security Policy Changes task by entering a comment for auditing purposes, and then click OK.
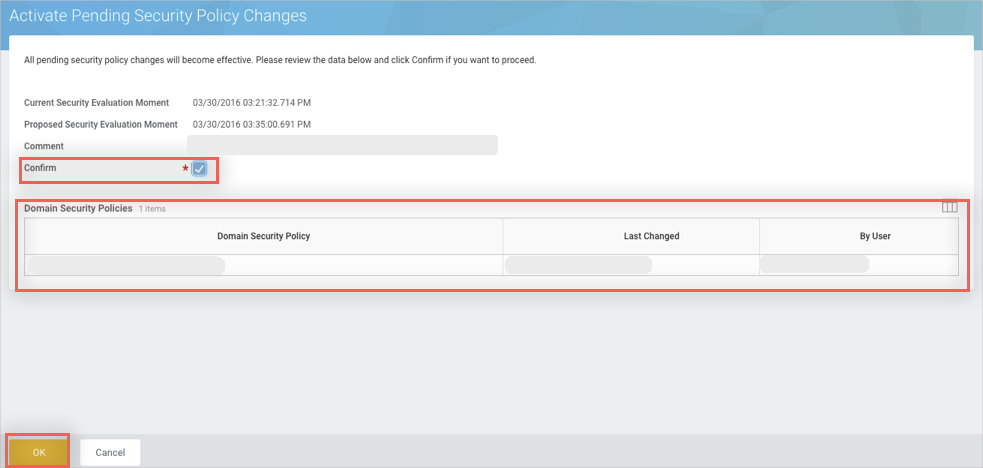
- Complete the task on the next screen by checking the checkbox Confirm, and then click OK. Find all the activated domain security policies listed in table Domain Security Policies.
6) Workday Web Services Endpoint Data
To obtain the Web services endpoint, simply look up the WSDL of any of the Web services in your organisation, as follows:
- Search for and open Public Web Services.
- From the Public Web Services list, select any one of them (e.g. Human Resources) and click the ellipsis (…) to reveal a drop-down menu.
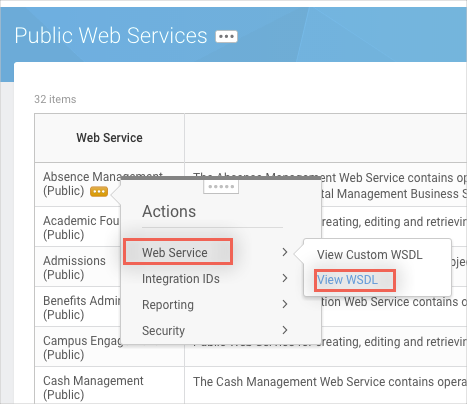
- Select Web Service \View WSDL, which displays the full WSDL in a separate window.
- In the WSDL, search for soapbind:address to see the Web services endpoint corresponding to the Web service that you chose. The Web Services endpoint is combined of:
[[https://\](https://\)]([https://\](https://\))<subdomain>/ccx/service/<tenantName>/Human_Resources/v36.1 - For the LeanIX SMP configuration, you only need two parts of the found URL: subdomain and tenantName.
For example, if the value in the WSDL is - https://implcc.workday.com/ccx/service/leanixsi/Human_Resources/v36.1.
- Subdomain: implcc.workday.com
- TenantName: leanix
6 Configure Workday Integration in LeanIX SMP
- Log into LeanIX SMP and navigate to Workday (https://us-si.leanix.net/#/service/Workday/settings or https://eu-si.leanix.net/#/service/Workday/settings)

Workday setup in SMP
- Click on Integrate button and fill out the form with appropriate credentials
- Subdomain (without the https:// part)
- Tenant Name
- Username
- Password
Updated 7 days ago